Pinterest

Follow Me on Pinterest

Monday, May 7, 2012

Craft A Week #30 Dinosaur Planter

It is yard sale season here in Central PA (YAY!)  This is my all time favorite time! My mom Dolly Mama insists our area has the best yard sales. I do agree that we have fantastic sales with high quality materials at super cheap prices. It really is a wonderful treasure hunt every Friday and/or Saturday. I especially love the neighborhood sales so I get a good walk in while bargain hunting.

Every season I make a list of things to look for while I go saleing. One of the things on my list this year is plastic dinosaurs to transform into little planters.  (This is also something I found on Pinterest).   I found the following dinosaur and it only cost me a quarter!

Sorry I didn't take a before picture but all I did was give the plastic dinosaur to my son-in-law Dan to drill a opening in the top. The opening was about 3"x 1.5".  The dinosaur is hollow on the inside so I just dumped some potting soil into the opening. I made sure to tap it down so there were no air pockets. 

I then took some succulent clippings from another planter and stuck in the dirt. You can dip the ends of the plants into Root Grow if you have it. I couldn't find mine and it was starting to rain so I just stuck the plantings in the dirt.


Isn't s/he adorable?!  I found a stegosaurus this weekend and sent it on to Dan to cut the hole in that one too. I'd really like to find some bigger dinosaurs. I think they will look cute as a display on the patio.  I want to find more so I can give as a gift to my dear friend D. I know she will love them!


This really was a super simple craft! (Especially because I didn't even have to cut the hole).

Happy Crafting

Thursday, May 3, 2012

Flax Seed Pizza Crust

Recently I decided to add flax seed to my diet. Sometimes I have digestive issues and flax seed is really good for that.  Flax seed is a good source of Omega-3's and super high in fiber.  WebMD has a good overview of the benefits of flax seed, located here:  WebMD flax seed.

I found a recipe for flax seed pizza crust on Yummly.  I know, it probably doesn't sound good but trust me, it was tasty.

Ingredients

1 1/2 cups flax seed meal
2 tsps baking powder
1 tsp salt
1 tsp oregano
1/2 tsp spices (italian)
1 tsp granulated garlic
                         1/2 tsp onion (granulated)
                         1 tbsp splenda (sugar substitute)
                          3 tbsps oil
                          3 eggs
                          1/2 cup water

Note:  To make flax seed meal, just grind up whole flax seed in a mini grinder. My grinder is small so I had to do this is several small batches.  You can get flax seed at most grocery stores, WalMart, or I got this on sale at Big Lots and was the usually expensive Old Mill Brand.

The photo to the right is what the flax seed looks like after being ground.  It becomes like a meal.  Now you just follow the instructions below.

Preheat oven to 425.

Mix dry ingredients together.
Mix wet ingredients together, add to dry, and mix well.
Let sit for 5 minutes to thicken up.
Spread on pan (I put a greased parchment paper down on the pan first and spread mixture on that.
Bake for 15-18 minutes until cooked through, then add toppings and cook until they are done.


There was no need to get out the roller to put this into the pan. I just dropped the crust on the prepared pan and smoothed with my fingers.  Just make sure it is relatively even so it bakes even. At this stage, put the untopped crust in the oven for 15-18 minutes.

Then take out of oven and add your favorite toppings.  I topped mine in the following order:  spinach pesto (recipe below); home made bruchetta from last summers tomatoes to add some color; cut up artichokes; an array of cheeses: feta, sharp cheddar and regular cheddar. 


I served the pizza with grilled zucchini.  Here it is plated:


My verdict is that it was pretty tasty.  It does have a very different taste from pizza made from a flour dough (this is nuttier and of grainy texture).  I thought it was good but my daughter Breanna didn't like it. She didn't like the texture of the crust and wasn't so keen on the spinach pesto either.  Clearly, this isn't for everyone.


Given the super good nutrient qualities of flax seed I will keep trying other recipes that incorporate that ingredient. I've seen other recipes (like breads) so I will just keep experimenting.

Spinach Pesto Recipe

On Sunday I was hungry for pizza and wanted to try out a recipe for pizza crust made from flax meal (see the next post).  My favoite pizza is basil pesto, artichokes and feta cheese. sadly, I didn't have any jarred pesto so I had to improvise.  I've been on a spinach kick lately; someties for dinner I will saute spinach and roasted garlic and just have that for dinner.  Yummy and good for you at the same time. Can't beat that!

I went on a search for an alternative to basil pesto.  I found the following recipe for spinach pesto. It is made the same way you would make basil pesto.  Another easy recipe.

Ingredients:

  • 4 cups washed, torn spinach leaves, stems removed, well packed. This was 2 bags of spinach
  • 3 garlic cloves, halved
  • 3 tablespoons pine nuts
  • 1/2 teaspoon dried leaf basil, crumbled
  • 1/4 cup extra virgin olive oil
  • 1/3 cup grated Parmesan cheese
  • 1/8 tsp. salt

Preparation:

Place a few spinach leaves, garlic, pine nuts, basil and a little oil in blender or food processor container. Cover and puree until leaves begin to look crushed. Continue adding spinach leaves a few at a time with small amounts of oil to blender, using a rubber spatula to help to combine pureed mixture. Add Parmesan cheese and 1/8 tsp. salt. Cover and process until spinach pesto mixture is smooth.
I added a little more salt and basil to this recipe. I also found it tasted much better after it sat in the refrigerator for a bit.  Granted, it's not basil and doesn't have that taste but it's not bad and serves as a stand in.
The recipe was originally posted on About.com's Southern Food.

Sunday, April 29, 2012

Craft A Week #29 Rag Wreath

I really haven't had much time for crafting since this was the last week of classes for the spring semester. While I am teaching a class this summer, I'm looking forward to having some free time to get back to crafting.  It really is my therapy and is just so good for my soul.  I have some big projects I am contemplating but, in the meantime, I was looking for a quick and easy project.

In my quest to complete another "pin", I made a rag wreath. Since another one of my goals is to use up the materials I have (rather than buying new supplies) I harvested the fabric I had in my craft room.  For some reason I had an overabundance of pink fabric. I picked up the white/brown plaid and blue at a yard sale on Friday to lessen the pinkness of the wreath. I got 1.5 yards of each for .25!


This project is really simple. Just cut your fabric into 1" strips that are about 10-12" long.  I wasn't too precise.  Some were wider and/or longer than others but it doesn't matter. Here's a tip: fold the material in half and you can cut twice as much in half the time. Or use a rotary cutter: I don't have one but this would have been really handy.  I just cut up the material I had and tossed into a big tin. I then had Natalie (my granddaughter) "stir" the fabric so it was all mixed together, making it easier to just pull from when making the wreath.


I bought a wire wreath from Michaels.  It was only $2.50 with the loyalty discount. I thought it would be much more than that. I bought a large one because I wanted it big for my front door. 


All you do is tie the fabric strips onto the wreath. I chose to tie it across all four wires because of the length of my strips. I thought of doing two rows but didn't really see much of a benefit of doing it that way....except that it would take me twice as long. 

I knotted the strips to make sure they would stay in place. And packed them really tight so the wreath would look full.  This was a really quick project; I completed the tieing in abut 2 hours.  I only used a fraction of the fabric strips. I definately have enough materials for another wreath.  Though the pinks are not really my color, I think it came out very cute and homey.  


This is such a simple and affordable project but it makes a big impact. You could easily (and cheaply) make a wreath for each season.  Now I've got one more thing to keep an eye out for when yard saleing!  I'd like to make an Americana wreath with red, white and blues. That would be a good fit for my style and the door. 


I highly recommend this project. I've got several weddings this summer and think I may make these as shower gifts. They will be perfect gifts for those who have a country theme.  Another super simple project! 

Happy Crafting!

Wednesday, April 25, 2012

Penn State Teddy Bears

It is the end of the semester so I haven't had much time to devote to my blogging. Between grading papers, prepping for upcoming presentations and summer school, and making sure all graduating students have their internships complete, I haven't had much time to be uber crafty.

With the help of my mom, Dolly-mama, we did manage to make a sweet graduating gift for this year's seniors. I found this cute pattern on Ravelry and we modified it to make them Penn State representations.  Here's the original pattern:


The pattern for this can be found on "All About Ami" located here: Graduation Teddy Bear Pattern

This is our We Are Penn State Proud Bear:


I had the PSU pins (picked up at a yard sale a few years ago for $5/100! Can't beat that price.  I think it adds a nice touch, don't you?


Here's the teddy bear army in process.  I put together 15 of them for students who are graduating this spring, summer, and fall. 


I wrapped each on in a treat bag that I got from the Dollar Tree.


I'm really pleased with the way they turned out. I will say though they took a long time to complete. Dolly-Mama crocheted them and sent them to me in pieces. I am so glad she did that! It took me at least an hour to just put each one together and add the decorations. I think I will come up with another gift for future classes!


Here's my students posing with their bears. They really appreciated the keepsake. I'm so proud of them all! They represent Penn State well.

Happy Crafting!


Friday, April 6, 2012

Craft A Week #28: A Week of Love for Easter

A few weeks ago our family welcomed it's newest addition: Marcus Robert.   I know I am biased but I think he's just adorable!

This brings the total of grandkids in our family to 8; four boys and four girls, ranging from 2 weeks to 10 years of age. I love them all and, as you can imagine, it can get quite pricey to buy gifts for each of them for every holiday.  In addition, most of the kids have other family who also buy for them so the kids just get an overabundance of stuff.

This year I decided to make my grandkid gifts. Based upon a pin I found that someone made to send to a family member who is serving in the military overseas, I modified the idea to fit my family.

I made each child (aside from newbie Marcus) A Week of Love From Gam gift. All I did was take 7 regular envelops and attached them all together in a line like this:

I labled each envelop with a day of the week, added stickers for decoration, and wrote "A Week of Love From Me To You" down the left side of the envelopes. 


I then gathered a bunch of little things from the Dollar Store (and other random places).  I didn't really have any plan; I just picked up things I thought would fit into the envelopes.


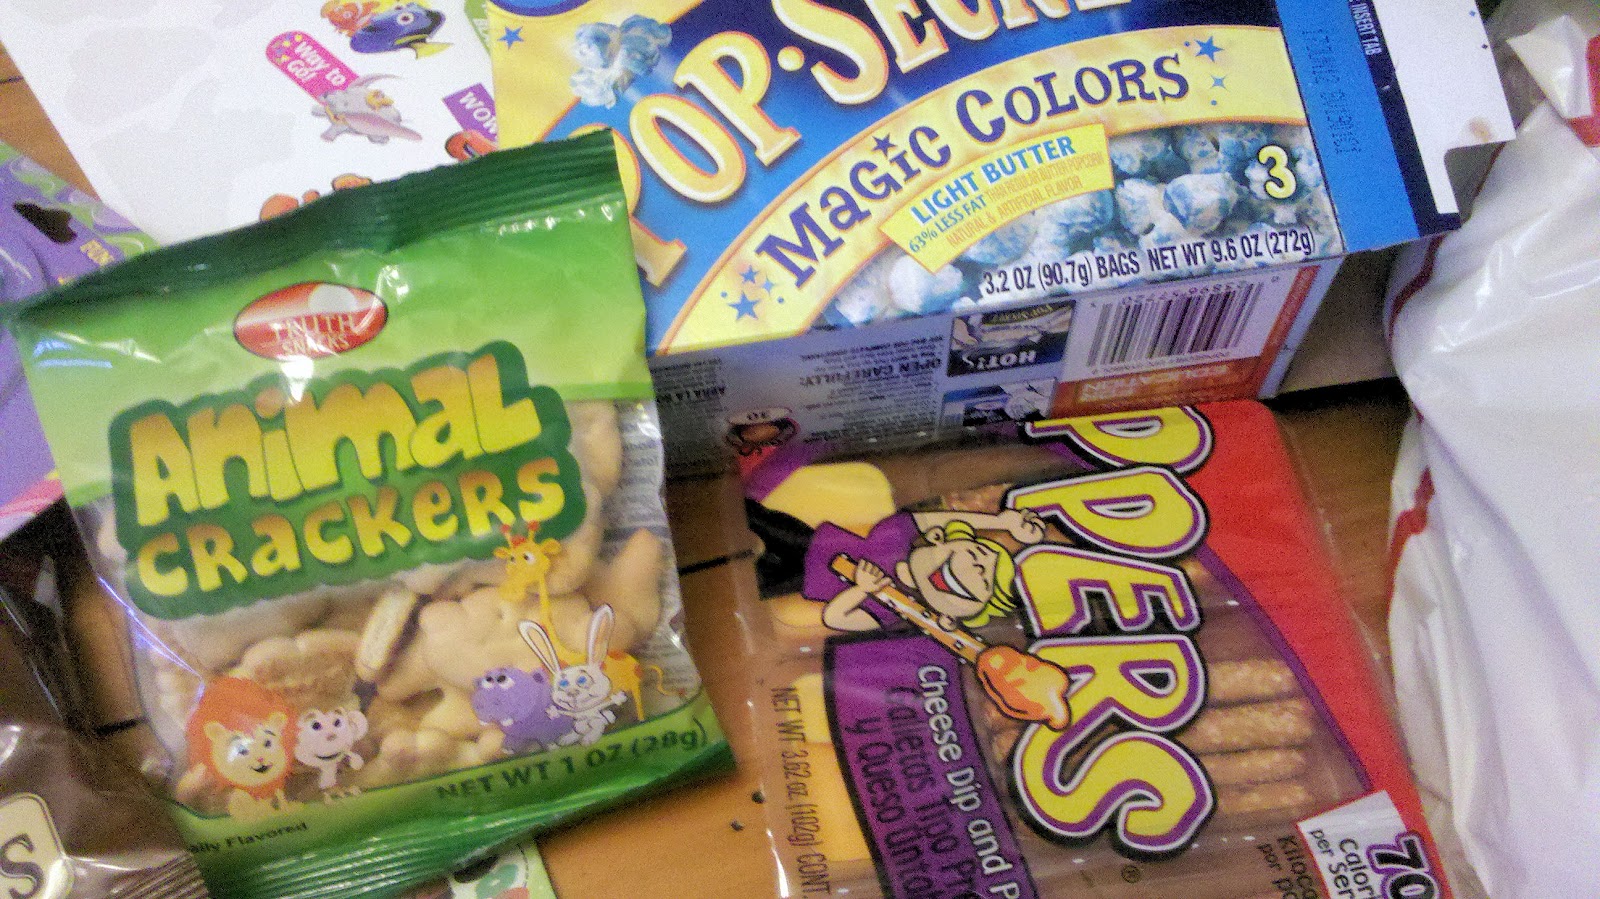
I used things like fruit snacks, candy bracelets and necklaces, animal crackers, pretzels, erasers, and microwave popcorn (that pops blue). I also had some cute little cards, chalk (for the younger kids) and packages of gum.


I then stuffed one goodie into each day, folded the package up, and tied a ribbon around it.


I love that each child will have little gift every day for a week from Gam.


It didn't cost much to make a bunch of these so it was really cost effective. So, to recap, here's the supply list:

  • 7 envelopes
  • Stickers and markers to decorate
  • Small goodies to fit inside each envelop.  (Lesson learned: the flatter, the better! I got a little carried away and couldn't fit some of the treats into the envelopes.  Things like gum, gift cards, flat candy, etc. would be good).
  • Ribbon to tie the package up
 I love this idea, especially for the grandkids who live far away. I think of this as a little emotional hug for them.  If I do this again though I would either use bigger, sturdier envelopes or make my own. I can see some of the kids opening this up on Sunday and having all the little things inside scatter across the room immediately. I also want to look at Target or Staples to see if I can find a 7 day file system that would work. That way the parents could easily refill the file and the gift can be extended. 


I hope you all have a wonderfully Happy Easter.  I wish blessings to you and your family.

Happy Crafting!


Saturday, March 31, 2012

Andes Mint Cookies Recipe

I found this recipe on Pinterest (where else?!) on the Six Sisters Stuff website. This is a great site; it is six sisters who created this blog to share recipes, crafts, and how to's with each other.  I recently gave them the Most Versatile Blogger Award.  Check them out; I think you will like them.

My son Zack has always loved Andes Mints so this recipe was perfect for a treat for him.  This morning, my granddaughter Kylie and I made them as a belated birthday gift for him (with help from brother A.J.).  The recipe is so easy: It only has 4 ingredients. Here's what you need:

1 box of Devil's Food or chocolate cake mix
1/2 cup oil
2 eggs
1 box of Andes Mints

1.  Heat oven to 350. 
2.  Mix together cake mix, oil and eggs.
3.  Drop by teaspoonfuls onto greased cookie sheet. 
4.  Bake 8 minutes (the original recipe said 6-10 but 8 worked best for us).

While the cookies are baking, unwrap all the candies. Make sure you do this or you will be scrambling to do the next step.

5.  As soon as you take the cookies out of the oven, place an Andes Mint in the center of the cookie. Let them sit for a few minutes so the chocolate will melt.
6. Once the candy has melted, spread chocolate over the top of the cookie.
7. Eat them up YUM!


Based on the size of our spoonfuls, this recipe made 36 cookies. We were fortunate that we had another box of Andes Mints because there are only 28 mints per box. We had a second box so we were able to make all the cookies. I suppose you could substitute another chocolate candy, like miniature Snickers or Milky Way.  I would cut those in half though because they would be too much candy for the size of the cookie.

 Here's my sweet granddaughter Kylie who made these cookies with me. They were really simple to make and we had alot of fun. And these cookies are so good!


Broccoli Slaw Salad Recipe

I really like broccoli salad but it always seems like alot of work for me. I know it's really not but it does take some time to clean and cut up the broccoli.  In my quest to work smarter and faster, I created this recipe for broccoli salad.  It is really yummy and quick to throw together.


1 bag of broccoli slaw
1/2 cup Sweet Vidala Onion Dressing
1/3 cup raisens/cranberries and nut mix
1/4 cup bacon bits
2 dashes of ground mustard
salt and pepper


I love this slaw mix. This is shredded broccoli, carronts and cabbage. There are other versions of this (just broccoli and/or broccoli and carrots mix). It doesn't matter what kind you get. It's a matter of preference. 

Put about half of the dressing in a large bowl and add the bag of broccoli slaw. I do this because you want to make sure the veggies on the bottom of the bowl will be covered.  Toss in the rest of the dressing and mix well.  I used tongs to flip it around to mix. Because the veggie mix is shredded, this worked better and was more manageable than using spoon.


Toss in the nuts and bacon.  I used this cranberry nut mix that I got on sale at Big Lots but you could use any mix.  And if you don't like nuts, you can just use cranberries or raisens.  I finished it off with just a few dashes of dried mustard.  I like the bite that dried mustard brings to this recipe. NOTE: If you don't have dried mustard, DO NOT use regular mustard. It just isn't the same! Add salt and pepper to taste.

I like to let the finished mix sit in the refrigerator for a few hours to let the flavors blend together.


You can add more or less of any of these ingredients to suit your taste. The salad throws together in a few minutes and I love it!  It's become my latest food obsession and I make a new batch of it every few days.  Try it, I think you will like it.


Monday, March 26, 2012

Day of the Dead Sugar Skulls Craft A Week #27

I think religious iconography is fascinating. I love how different cultures interpret and convey their religious beliefs. I grew up in Southern California and, while I was not raised Catholic, I have a strong appreciation for Catholic artistic interpretation of religious symbols. I've always thought that Sugar Skulls for the Day of the Dead are particularly cool.

If you aren't familar with the Day of the Dead, it is a National Mexican holiday that takes place on November 1-2. The holiday focuses on praying for and remembering friends and family members who have died. For more information on Day of the Dead, please go to Mexican Sugar Skull.

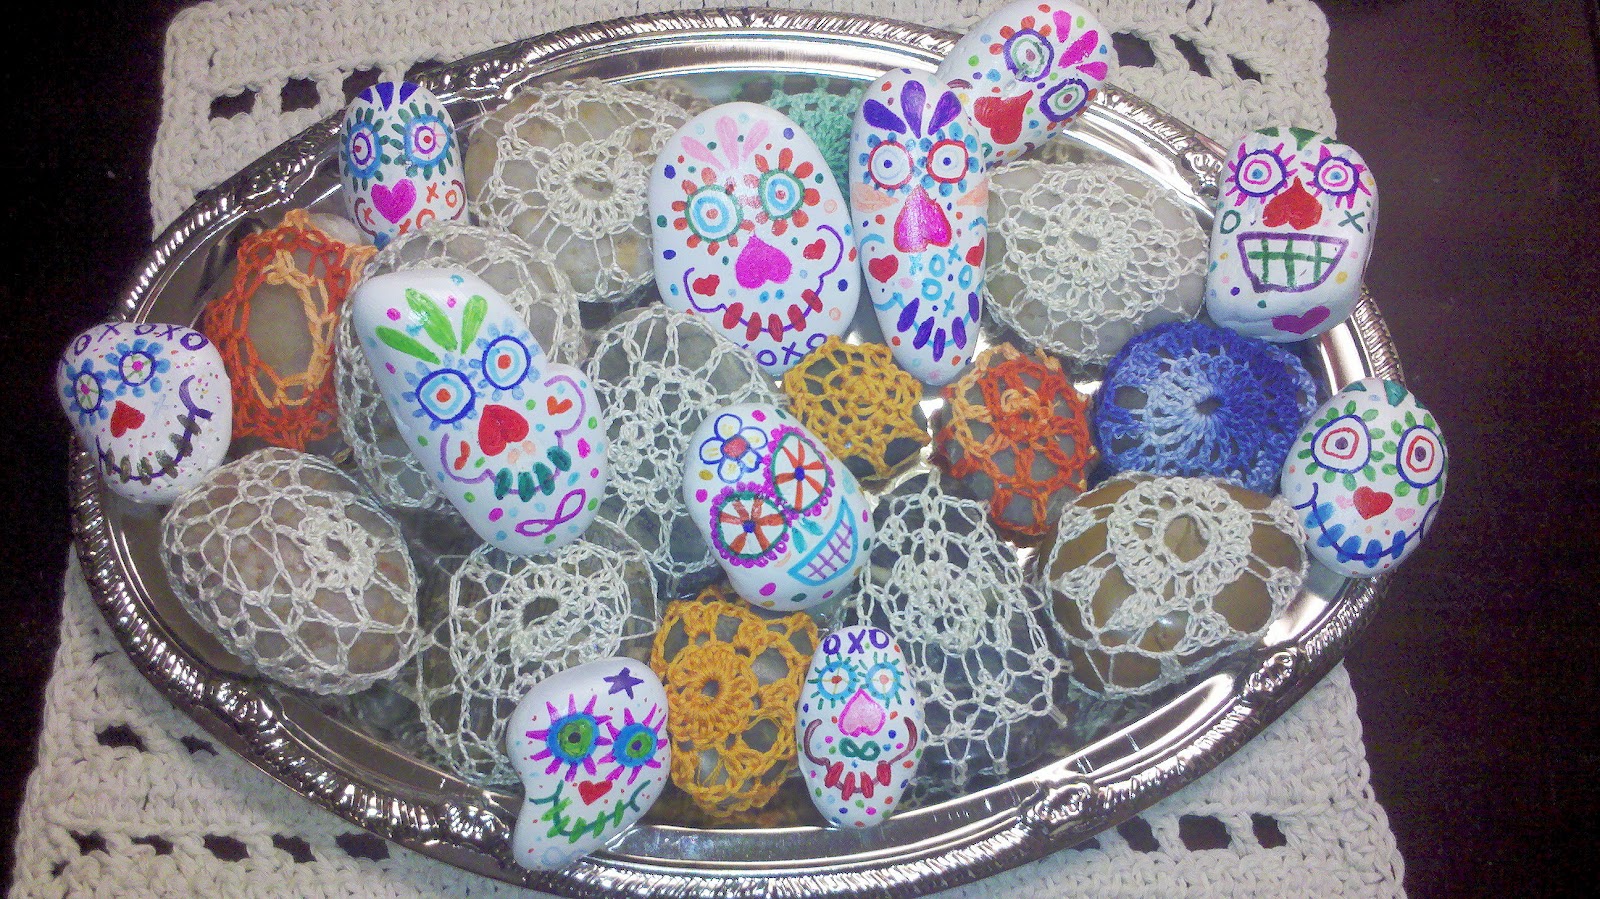
One of the traditions that occurs during Day of the Dead is honoring lost loved ones with Sugar Skulls. These are supposed to represent those who have passed.  While they are traditionally made from sugar (hence the name Sugar Skulls), I made some out of painted rocks. I think they will make nice worry stones.  What do you think?


This is a picture of my Sugar Skull and crocheted rocks. It's getting a little crowded on here; think it's time to do some gifting. (Cydnee, which is your favorite?)

Happy Crafting!

Craft A Week #26 Owl Will Always Love You Crochet Blanket

Pinned ImageSeveral weeks ago I found a post on Pinterest of some really cute crocheted baby blankets that have a stuffed animal head attached.  In my family, we call these "woobies". A woobie is like a favored blanket or snuggly toy.  Here's the picture I found. Aren't they cute?!

I so loved the idea, but when I clicked on the link, the pattern was written in Swedish. I tried Google translate but the terms didn't really translate completely so I was creative in my creation. (If you are interested, the original posting can be found here:  http://brittasami.blogspot.se/search/label/Snuttefiltar%20%28gratis%29.

I thought they were all cute but I decided to try my hand at the Owl - and gave him the title of "Owl Will Always Love You". Here's how Owly came out:

Isn't he sweet?  I like how his wings look like little hands.

Since he was a pilot project, I used the yarn I had on hand. It is all acrylic yarn (not my favorite but easy to work with). The varigated is some vintage yarn that Shana got me a few years ago. (See, I knew I kept it for a reason). 

I tried to follow the directions for the owl head, which I was able to loosely comprehend. I did so much modification though that I wasn't able to write down all the changes I made. I was a little frustrated but then had an epiphony!

It occured to me that all I had done was make a large granny square and put a stuffed animal head onto it.  I then realized that I could make a woobie of any kind....all I have to do is find a cute animal head and put on a blanket. See what I mean?


The next one I make, I will write up the pattern. But seriously, you can make a woobie of any kind based on what animal you like. I trolled Crochet Pattern Central and found lots of possibilities.  I want to make my new grandson Marcus Robert a sleeping kitty in honor of our family cat Bailey. 

UPDATE 3/28/12: Owlie is now posted on my etsy store for purchase. Check back often because I'm making a series of these woobies.
Happy Crafting!