Pinterest

Follow Me on Pinterest

Saturday, September 17, 2011

Random Bits of Goodness Mirror

Those who know me understand that I truly enjoy kids, toys, and crafts. I love my grandchildren (and their friends, and my neighbor's kids). Our family has six children between the ages of 3 and 9 (and another sweet little baby joining us in March 2012). 

Five of our six children are within 2 years of each other so they've gone through the same developmental cycles around the same time. That means I've got alot of little plastic toys all over my house! Now that the most of the kids have outgrown them, I was on the lookout for something to do with all the residual playthings. (Obviously, I wasn't about to just toss the stuff out).  I came upon this very cool project!

The good people at the website "Can't Stop Making Things" (don't you love that name?!) gave me a solution. They call it a Faux Metal Mirror. I call it Random Bits of Goodness! I love all the little chachke that comes with little kids. This project gave me a great way to recycle, save and display toys that would otherwise have been thrown away.

It's a proces, so bear with me!

Supplies:

  • Artist Canvas (mine is 16" x 20")
  • Mirror tile (mine is 12" x 12")
  • Lots of discarded plastic toys, or anything in your junk drawer (mine took alot. I knew there was a reason I saved all those KinderEgg toys)!
  • Liquid Nails glue
  • Spray paint for plastic (I bought pink because it was on sale at Ollie's for .99)
  • Primer spray paint (I used rust color)
  • Copper Metal & Patina Glaze by Valspar
  • Antiquing Glaze by Valspar
  • Clear spray

Tools
  • Masking tape
  • Paint brush
  • Clean cloth (to apply the Antiquing Glaze)

Note: "Can's Stop Making Things" said to use Copper Topper but I couldn't find it locally so I substituted the Valspar products.


This is what I started with. I centered and glued the mirror onto the canvas.


Glue all the goodies onto the canvas, around the mirror.


Here's a close up. This was a process for me. I put things where I thought I wanted them but let it sit overnight before glueing in place. I'm glad I did because I changed some things. When you are satisfied with your placement, glue them into place.


Tape off the mirror. Spray paint with a paint made for plastic. The color doesn't matter. (Mine was pink). This coat is just so the true base coat will adhere appropriately. Apparently it will stick better if all pieces are covered in the plastic paint. I used several light coats to make sure everything was covered without dripping.
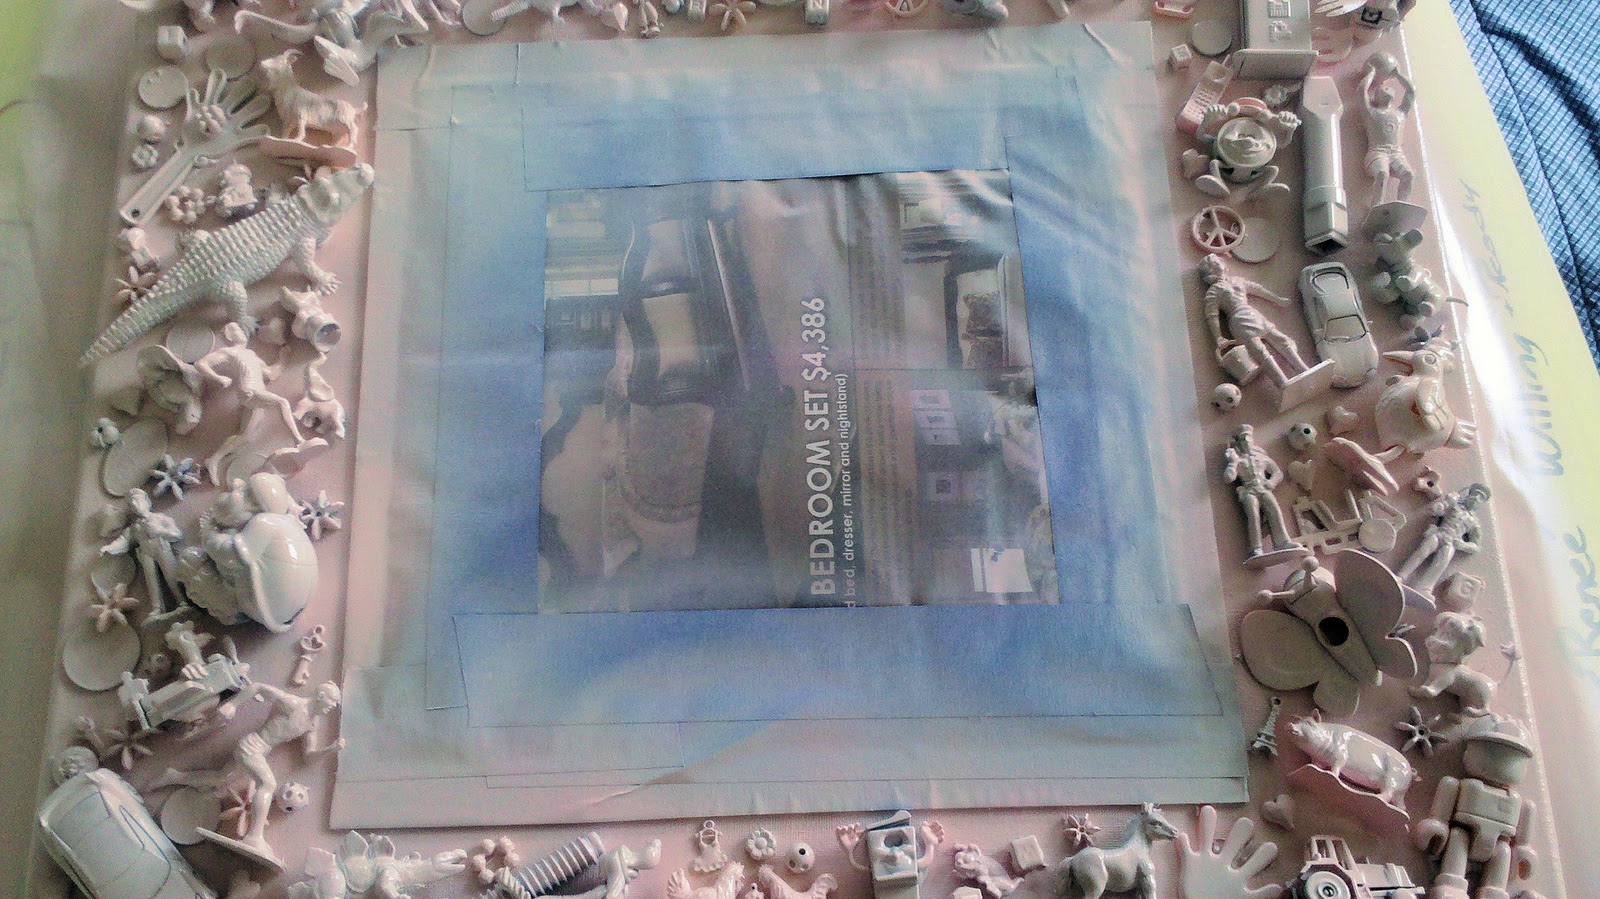


Allow to completely dry. Once that is done, spray with the rust primer.  Again, use light coats but make sure to completely cover all sides of the objects with the paint.


The Valspar product says to allow the base coat to dry at least 4 hours before using. This was a total test of patience for me as I really wanted to see the completed project!


The next step was to apply the copper glaze. I put two coats on, allowing the first coat to dry before applying the second. While the second coat is still wet, I applied the antiqueing glaze. I let it dry overnight and then sprayed with the sealer.


Viola! My completed project!  I absolutely love how it came out! I don't think the pictures really do it justice. I'm still waiting for the sealer to dry and I will take more pictures later. Looks like metal, right?! I was going to hang this in my spare bedroom but I love it so much I think I will hang in the living room.


Since this came out so well, I'm going to make another picture. I'm interested in religious iconography and think I shall do one with crosses and angels. Stay tuned!

Thursday, September 15, 2011

Interactive Art


Candy Chang is an interactive artist who installed some very cool projects in New Orleans. While this installation is large and based in a public area, I can also see it on a much smaller scale (maybe 3' x 4'?) on a wall of the deck. It would be a great conversation starter, as well as a wonderful way to get to know your loved ones better.  Very cool!

Candy Change Interactive Art

Amazon Trade In Program

I knew that Amazon had a book buy back program but just realized they will also give you gift cards for used electronics, games, and dvd's as well.   I did just a quick search of some videos I have (that are brand new) and found they offer about $10 each. How great is that! If you are like me, once I'm done watching a video, I am done.

I am all about saving (and making) money. I think this is definately worth taking a little bit of time to see what you can trade in. Christmas is right around the corner and we will all need some more cash!

Amazon Trade In Program

Remodeling and Decorating Ideas

When you are remodeling and/or decorating, the options can be overwhelming.  The following site is an incredible resource! You can browse by both style and space, which is great. You can save ideas in your Ideabook (online storage). You can also read (or submit your own) questions for decorating suggestions.  Very cool resource!
houzz.com

Wednesday, September 14, 2011

Pat Roberson's Marital Advice

While I appreciate the stress Alzheimer's puts on the family, I'm not sure how (or why) Mr. Moral Minority, Pat Robertson, can give this kind of marital advice. If you believe that marriage is "til death do us part", how could you possibly council someone to divorce their spouse because they have Alzheimer's?

Pat Robertsons Marital Advice

I find it fascinating that someone who professes to being a Christian and "upholding Christian values" would identify this as a solution. Oh the hypocrisy!

Monday, September 12, 2011

Amazing Jenga Dog

The dog in this video is absolutely amazing and so very patient! Clearly, I am a lazy dog owner because it would never dawn on me to even think of expecting my dog to do something like this.


Considering Marcella found the Tupperware on the counter that held the homemade dog biscuits (and ate 8 of them), I find it hard to believe her capable of this kind of delayed gratification.  It is a pretty neat trick though!


SkinnyTaste Hot Spinach and Artichoke Dip Recipe

I know we all love hot spinach and artichoke dip. It tastes great but really packs alot of calories if you make it the traditional way with mayo. I found this recipe from Skinnytaste.com that uses Greek yogurt that is far healthier (and less calories) than the other version.  I really don't like the taste (or texture) of Greek yogurt but this sounds like a tasty substitute. I doubt you will taste the yogurt because all the other flavors will make up for it.  Next time I want the dip, I will try this recipe.

Skinny Taste Hot Spinach and Artichoke Dip Recipe

Friday, September 9, 2011

Spicy Peanut Noodles

I had some left over pork loin that needed used up so I decided to make these spicy peanut noodles. They were so tasty! 


Here's the recipe:

In a pot of boiling salted water, cook the spaghetti until tender. Drain and set aside.

Sauce:
  • 1 large garlic clove
  • 3/4 cup chunky peanut butter
  • 1/2 cup unseasoned rice vinegar
  • 3 tablespoons plus 1 teaspoon sugar
  • 6 tablespoons soy sauce
  • 1/4 cup water
  • 1 tablespoon toasted sesame oil
  • 2 teaspoons crushed red pepper
  • 1/2  teaspoon ground ginger

In a blender or food processor, chop the garlic.  Put all other ingredients in blender and puree. Transfer 1/2 cup of the peanut dressing to a bowl and toss with the noodles.

As I said, I had some leftover pork loin which I chopped into 1” pieces and sautéed along with ½ of a red pepper. I also added some stir fry veggies. I had a bag of them but you can also just make your own with broccoli, water chestnuts and bean pods.  Next time I think I will make my own because there just weren’t a lot of veggies in the bag I got.

I then plated the noodles with peanut sauce and topped with the pork/veggie mixture. I topped with some more peanut sauce. You can also toss with cilantro, green onions and fresh lime juice (I didn’t have these).

This was really yummy and made a lot of sauce (8 ounces). I’m wondering if this dressing would can okay.

Wednesday, September 7, 2011

Recycled Clothes to Dog Toy

I have a big back of clothes that I was planning to take to Goodwill, however, I think I will use most of the stuff for this dog toy.


It is super easy: Just cut old t-shirts into 1" x 20" strips, braid/twist together, and knot at the ends. How simple is that?!  I think I've found Christmast gifts for all my dog family/friends.  If you want to make these yourself, here's the link:  Recycled Dog Toy.  I will post pictures after I get some made.

UPDATE:

Here's one of the shirts I started with.  It was one that all 3 of the grandboys wore and have now outgrown.  From this, I followed the directions from the link above: Cut 20 1" x 20" strips.  I then knotted and twisted the strips.


This is what I got:                                                          Clearly, Marcella loves it!


While this was good for her (since she's a medium/large dog), I wanted something different for Frank and Beans (because they are small). I adjusted the instructions:  1) Cut 20 1" x 12" strips.   2) Divided those strips into 2 groups of 10.  3) Knotted one end TIGHT and continued to tightly knot the strips. (I thought this would hold together better than just twisting).  4) I also knotted the loose ends so it would stay together better.

Here's my modified dog toy:


I think this is perfect for small dogs. It's about 7" long and pretty sturdy.  Now if the rain ever stops I can run my treat box to the post office. Be on the lookout boys for goodies for Ant Bea!

September 14, 2011 Update: 
The boys with their toys! Aren't they too cute?!


Teddy Bear from Recycled Sweater

I was furthering my time wasting skills today with my unexpected day off (because of flash flooding in the area). I'm looking for projects to make that use recycled materials.  Some of the projects were just dumb (newspaper sandels?! Who are they for, homeless people)?!

I did find a cute idea to make a teddy bear out of a recycled sweater. I'm thinking velour or chennille would be good. Too bad I don't sew!


Upcycled Teddy Bear