Pinterest

Follow Me on Pinterest

Monday, May 6, 2013

Floor Lamp Planter

The following was created because of an inspiration someone posted on Facebook. (Thanks Debbie)!  A super simple and cute idea that incorporates some of my favorite things: Upcycling and planting.


I had this old floor lamp that I wasn't using anymore. I got the black basket at the Dollar Store and used Gorilla Glue to secure it.  Once that dried, I placed the coco mat inside (cut to fit). I then put some sphagnum moss and dirt in, followed by plants. I used chenille plant and I'm not sure what else the others are called. I chose these plants because I thought the combination will give both height and will droop over the sides as the plants grow.


To top it off, I put this sweet solar motioned piggy that I got from Chinatown L.A.  What a perfect home for him!


Isn't he cute?!
 
Another super simple project.  My recommendation is to not overfill the planter. This will grow all summer so you want to make sure the plants have room to grow. I will update this post later in the summer after it fills out.

Sunday, April 28, 2013

Spring Planting

Hi All!

First, my apologies for not creating any new posts for a very long time. Life (and making a living) got in the way and my craftiness really got put on the back burner.  Now that school is over for the summer, I am hoping to spend a summer crafting and repurposing (and posting).

It is finally springtime here in the Mid Atlantic; I am inspired.  I stumbled upon this adorable head planter at Rite Aide of all places!  Best of all, it was 50% off so it only cost me $10.  Isn't he cute?

I went back today for another one but they were sold out (no suprise there).  So I decided to get creative and make my own.

I looked around the house to see if I could repurpose something.  I found this doll bust that had hair to style. I got this for Jasmine a few years ago and think she played with it once or twice.

While she is sweet, I knew there was a better place for her than being stuck in the cupboard under the bathroom sink.  I figured no one would miss her so I got out the exacto knife and went to work.

This was very easy to do. I started at the back of her head and cut the plastic close to her hair line.  I wanted to keep as much of the plastic head as possible so it would be big enough to hold a plant. The plastic was soft (plastic doll baby soft) so it didn't splinter or break.

Because she is plastic, I started with a primer to make sure and cover the bright pink of her shirt.  I let that dry a bit and the sprayed with Rustolium Rosemary Hammered spray paint. (Now that I'm looking at the can it says it is paint and primer combined so maybe I didn't need the primer afterall.

While the paint didn't adhere like I originally planned (some streaked and ran) I love the way she turned out. It is also about to rain and was pretty windy so that may also have contributed to her mottled look.  That said, I think the imperfections make her look weathered and antique.  I plan to spray her again when the weather is better and will also spray her with a sealant. 

 I just stuck in this chenille plant to see what she will look like with "hair". I think I will put some succulents because they grow slow and are super simple to take care of. 

There's something about her that reminds me of the Bird girl of Savannah.  Something sweet and wistful. 

So now I have yet another thing to keep an eye out for while yard saling! Here's hoping I have a cool collection of them by the end of summer.  And if I plant succulents in them, they will just lay dormant during the winter and come back to life again in the spring.

I hope you like my first post in months. I've got some other projects that I have in mind to work on. Again, thanks for stopping by to visit. 

Happy Crafting!

Sunday, August 12, 2012

Craft A Week #33 Upcycled Table

I was highly motivated today and got my craft on! I had an old table that's been collecting dust in my garage for a few years and decided to repaint and repurpose it. I have my granddaughter Jasmine with me this summer and she loves to play on the computer. I have two laptops but I really wanted her to have a designated computer area. As part of my effort to have my new living room comprised of crafty things, I decided to transform the table.

Here's what it looked like before:


(That's Natalie cleaning the underside of the table)!

Then we spray painted the heck out of it!


It took almost two entire cans of paint.

I liked this color but wanted to try a different technique to finish it.  A few weeks ago I found a lace shirt at The Salvation Army for $1.50.  I deconstructed the shirt so it could be layed flat on the table.


I had one good size piece (the back) and several smaller (the breast pieces and sleeves).  I then layed them out on the table and lightly spray painted a butter yellow over them.


Because of their odd sizes, I had to lay the pieces so try and cover as much as possible in one spray. I only did one light coat of paint because I really wanted it to be subtle.


As you can see, this technique gave a real vintage look to the table.  Here's a close-up:


Isn't it pretty? I love this look. 

I finished off the table with a few spray coats of shellac to protect it. 

This was a Super Simple craft! From start to finish it took me less than 2 hours. If I do this again I will use one solid piece of lace rather than the pieces. It would give it a much cleaner look, sort of like a lace tablecloth effect.

Here is the table in it's new home:


I love this table because it has leaves in it. When Jas is not playing on the computer, the table can just hold the printer and monitor.  But the leaf flips up to create an added workspace.


And finally, here's Jasmine and Natalie putting the table to good use!


They were very proud of their accomplishment! (They helped spray paint). I love showing a new generation about repurposing!

Happy Crafting!

Wednesday, July 25, 2012

Free Amazon Prime Student for 6 Months

I found this great bargain and had to share. Amazon Prime for Students has an offer of 6 months free (a $39 offer). This is a great deal!

Included in Prime Membership are free Amazon shipping, Prime instant videos and the Kindle library. Definately worth checking out. 

The link is here:  Amazon Prime for Students.  Just remember that if you don't cancel after 6 months, they will automatically sign you up for another 6 months at $39. Still not a bad price for what will be an entire year of service. 

Pass it on!

Monday, July 23, 2012

Craft A Week #32 Candy Man

When I was in Fort Wayne last week I went to the Three Rivers Festival. It was so much fun! They had lots of reasonably priced crafts, food and fountains for the kids to play in. I wanted to get a little something for the grandkids and I found these cute Candy Men.  While they were pretty inexpensive ($1.25 each) after I bought them I realized I could make my own.  Here's all you need to make this cute favor.


1 Carmel candy (for the head)
1 rectangular candy (for the body)
2 bubble gums (for the arms)
2 Smarties (for the legs)

The one I originally purchased had a cute box of candy cigarette like candy for the body. I couldn't find them so I substituted with chocolate bards. I made them using Twix, Snickers, Butterfingers, and Mars.

All you do is hot glue the pieces all together.  I also added a little tie and a string to hang.  You can see the result below.


Isnt' he cute?!  I made a bunch of these for my grandson A.J.'s birthday party as favors and everyone loved them. I think these would be a super cute Halloween party favor.  And they cost pennies to make (though rather time intensive) but very sweet.

Happy Crafting!

Craft A Week #31 Inspirational Cups

I've got a long term goal of making a book of inspirational quotes for my grandkids. I've been storing lots of phrases and poems on Pinterest for some time now but don't really have the time to put it all together like I want.  Rather than have all that wonderful material just sit there, Jasmine and I decided to create some cool cups.

(Awhile back I posted a gift I made for my nephew and his wife for a wedding gift; this is done the same way).

Here are Jasmine and my wonderful work:


Here's a closer look at the one I made for Jasmine:


The quote is: 
You are braver than you believe
Stronger than you feel
Smarter than you know
But the most important thing to remember is
Even when we are apart
I will always be with you
Beautiful, right?

Jasmine made one for Jon that says:

You are special and amazing and are here to do wonderful things.
Follow your heart and let your beautiful shine.

Sweet right?

The one she made for Breanna says:
Always chase your dreams
instead of running from your fears


I love that Jasmine picked out the quotes herself. What a meaningful gift and a true reminder of the giver every day.

(In case you don't recall, these were made with Sharpie markers then baked in a 350 degree oven for 1/2 hour).  Super simple craft!

Thursday, July 19, 2012

Doggie Fro Yo Recipe


It has been crazy hot here in Central PA this week (104 yesterday) so I thought I'd give the pups a cool, frozen treat. I've seen the frozen dog treats at the grocery and they are pretty pricey. I did a quck search online and found the following frozen yogurt recipe.

Doggie Frozen Yogurt Recipe

36 ounces of plain, low fat yogurt
1 cup low sodium peanut butter
2-4 ounce jars of banana baby food
2 T honey

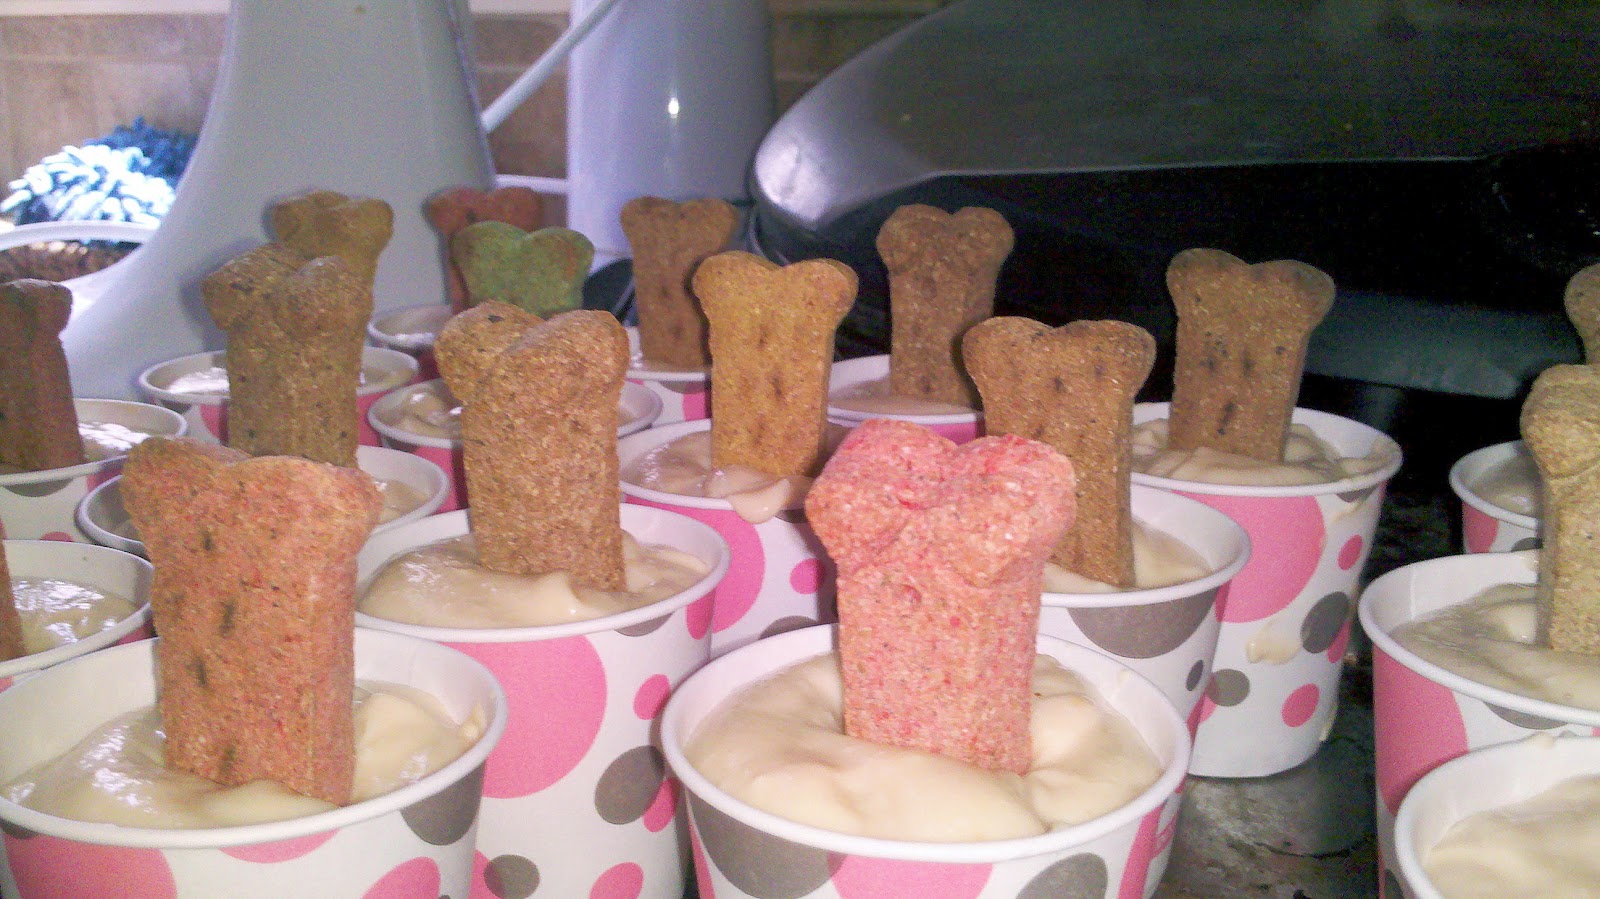
Mix the ingredients together then pour into 3 ounce dixie cups. Put a dog biscuit in the middle to use as a handle.  Freeze for a few hours.  When solid, cut off the cup and serve.

You can also cut this recipe in half. I made a big bunch since my granddogs were coming over. The dogs LOVED them!


This is Flea. The picture is misleading. While he started off eating this like a human, he quickly decided to chomp the entire thing.


You can see Flea in the background. I can't believe he didn't get a brain freeze. Georgie, however, chose to savor his treat.


Here's Flea in his pool. He LOVES the water! His nickname is Big - for good reason. His body fills the kiddie pool.


Stay cool!

Monday, May 7, 2012

Craft A Week #30 Dinosaur Planter

It is yard sale season here in Central PA (YAY!)  This is my all time favorite time! My mom Dolly Mama insists our area has the best yard sales. I do agree that we have fantastic sales with high quality materials at super cheap prices. It really is a wonderful treasure hunt every Friday and/or Saturday. I especially love the neighborhood sales so I get a good walk in while bargain hunting.

Every season I make a list of things to look for while I go saleing. One of the things on my list this year is plastic dinosaurs to transform into little planters.  (This is also something I found on Pinterest).   I found the following dinosaur and it only cost me a quarter!

Sorry I didn't take a before picture but all I did was give the plastic dinosaur to my son-in-law Dan to drill a opening in the top. The opening was about 3"x 1.5".  The dinosaur is hollow on the inside so I just dumped some potting soil into the opening. I made sure to tap it down so there were no air pockets. 

I then took some succulent clippings from another planter and stuck in the dirt. You can dip the ends of the plants into Root Grow if you have it. I couldn't find mine and it was starting to rain so I just stuck the plantings in the dirt.


Isn't s/he adorable?!  I found a stegosaurus this weekend and sent it on to Dan to cut the hole in that one too. I'd really like to find some bigger dinosaurs. I think they will look cute as a display on the patio.  I want to find more so I can give as a gift to my dear friend D. I know she will love them!


This really was a super simple craft! (Especially because I didn't even have to cut the hole).

Happy Crafting

Thursday, May 3, 2012

Flax Seed Pizza Crust

Recently I decided to add flax seed to my diet. Sometimes I have digestive issues and flax seed is really good for that.  Flax seed is a good source of Omega-3's and super high in fiber.  WebMD has a good overview of the benefits of flax seed, located here:  WebMD flax seed.

I found a recipe for flax seed pizza crust on Yummly.  I know, it probably doesn't sound good but trust me, it was tasty.

Ingredients

1 1/2 cups flax seed meal
2 tsps baking powder
1 tsp salt
1 tsp oregano
1/2 tsp spices (italian)
1 tsp granulated garlic
                         1/2 tsp onion (granulated)
                         1 tbsp splenda (sugar substitute)
                          3 tbsps oil
                          3 eggs
                          1/2 cup water

Note:  To make flax seed meal, just grind up whole flax seed in a mini grinder. My grinder is small so I had to do this is several small batches.  You can get flax seed at most grocery stores, WalMart, or I got this on sale at Big Lots and was the usually expensive Old Mill Brand.

The photo to the right is what the flax seed looks like after being ground.  It becomes like a meal.  Now you just follow the instructions below.

Preheat oven to 425.

Mix dry ingredients together.
Mix wet ingredients together, add to dry, and mix well.
Let sit for 5 minutes to thicken up.
Spread on pan (I put a greased parchment paper down on the pan first and spread mixture on that.
Bake for 15-18 minutes until cooked through, then add toppings and cook until they are done.


There was no need to get out the roller to put this into the pan. I just dropped the crust on the prepared pan and smoothed with my fingers.  Just make sure it is relatively even so it bakes even. At this stage, put the untopped crust in the oven for 15-18 minutes.

Then take out of oven and add your favorite toppings.  I topped mine in the following order:  spinach pesto (recipe below); home made bruchetta from last summers tomatoes to add some color; cut up artichokes; an array of cheeses: feta, sharp cheddar and regular cheddar. 


I served the pizza with grilled zucchini.  Here it is plated:


My verdict is that it was pretty tasty.  It does have a very different taste from pizza made from a flour dough (this is nuttier and of grainy texture).  I thought it was good but my daughter Breanna didn't like it. She didn't like the texture of the crust and wasn't so keen on the spinach pesto either.  Clearly, this isn't for everyone.


Given the super good nutrient qualities of flax seed I will keep trying other recipes that incorporate that ingredient. I've seen other recipes (like breads) so I will just keep experimenting.

Spinach Pesto Recipe

On Sunday I was hungry for pizza and wanted to try out a recipe for pizza crust made from flax meal (see the next post).  My favoite pizza is basil pesto, artichokes and feta cheese. sadly, I didn't have any jarred pesto so I had to improvise.  I've been on a spinach kick lately; someties for dinner I will saute spinach and roasted garlic and just have that for dinner.  Yummy and good for you at the same time. Can't beat that!

I went on a search for an alternative to basil pesto.  I found the following recipe for spinach pesto. It is made the same way you would make basil pesto.  Another easy recipe.

Ingredients:

  • 4 cups washed, torn spinach leaves, stems removed, well packed. This was 2 bags of spinach
  • 3 garlic cloves, halved
  • 3 tablespoons pine nuts
  • 1/2 teaspoon dried leaf basil, crumbled
  • 1/4 cup extra virgin olive oil
  • 1/3 cup grated Parmesan cheese
  • 1/8 tsp. salt

Preparation:

Place a few spinach leaves, garlic, pine nuts, basil and a little oil in blender or food processor container. Cover and puree until leaves begin to look crushed. Continue adding spinach leaves a few at a time with small amounts of oil to blender, using a rubber spatula to help to combine pureed mixture. Add Parmesan cheese and 1/8 tsp. salt. Cover and process until spinach pesto mixture is smooth.
I added a little more salt and basil to this recipe. I also found it tasted much better after it sat in the refrigerator for a bit.  Granted, it's not basil and doesn't have that taste but it's not bad and serves as a stand in.
The recipe was originally posted on About.com's Southern Food.