Pinterest

Follow Me on Pinterest
Showing posts with label craft. Show all posts

Friday, June 6, 2014

Cross Stitch on Chicken Wire

First, apologies for not posting for a very long time. I have been diligently working on my 365 Days of Art Challenge. I started watercolors, which I love. I never thought I could draw so I didn't even bother to try. I realize now that you just have to deconstruct the image. Then once you have the basic shell down, the watercolors do all the rest. I will post some of my work at a later time.  Now on to my new favorite obsession! Cross stitch on chicken wire.
 
Last year I found this inspiration piece on Pinterest.  I love the look but really felt that I 1) didn't have a large enough wall to hang this large of a peg board; and 2) that it would be a real challenge to work with that medium because it doesn't bend. It seems like it would be a real gross motor activity to produce this work.


So I started looking and thinking of an alternative canvas. I was at Lowes last week when it came to me: chicken wire! It is bendy so it can be rolled up to make it easier to work with. Plus I love the juxtaposition of mediums - the hard, industrial look of the chicken wire and the softness of the yarn. 
 
 
I found a neat old school rose cross stitch pattern on Pinterest.  I had an old picture frame I wanted to repurpose so I cut the chicken wire several inches bigger than the frame. I put duct tape around the cut edges so it didn't tear up my hands/arms/legs while I was working with it.  I used garden cutters to cut the wire because I didn't have wire cutters. It worked pretty well. But it did leave a rather jagged edge that you really need to cover up so it doesn't hurt you.
 
 
This is the final, framed picture. I really like the openness of the work.  I have the picture just sitting in the frame until I can have my son in law frame it tightly for me. I want to hang on my back porch so it will be right at home there. 
 
What do you think? I rather love it!  I found two large poster frames at a yard sale last weekend and they will be my next project. I will make sure to post them also.


Sunday, April 28, 2013

Spring Planting

Hi All!

First, my apologies for not creating any new posts for a very long time. Life (and making a living) got in the way and my craftiness really got put on the back burner.  Now that school is over for the summer, I am hoping to spend a summer crafting and repurposing (and posting).

It is finally springtime here in the Mid Atlantic; I am inspired.  I stumbled upon this adorable head planter at Rite Aide of all places!  Best of all, it was 50% off so it only cost me $10.  Isn't he cute?

I went back today for another one but they were sold out (no suprise there).  So I decided to get creative and make my own.

I looked around the house to see if I could repurpose something.  I found this doll bust that had hair to style. I got this for Jasmine a few years ago and think she played with it once or twice.

While she is sweet, I knew there was a better place for her than being stuck in the cupboard under the bathroom sink.  I figured no one would miss her so I got out the exacto knife and went to work.

This was very easy to do. I started at the back of her head and cut the plastic close to her hair line.  I wanted to keep as much of the plastic head as possible so it would be big enough to hold a plant. The plastic was soft (plastic doll baby soft) so it didn't splinter or break.
Because she is plastic, I started with a primer to make sure and cover the bright pink of her shirt.  I let that dry a bit and the sprayed with Rustolium Rosemary Hammered spray paint. (Now that I'm looking at the can it says it is paint and primer combined so maybe I didn't need the primer afterall.

While the paint didn't adhere like I originally planned (some streaked and ran) I love the way she turned out. It is also about to rain and was pretty windy so that may also have contributed to her mottled look.  That said, I think the imperfections make her look weathered and antique.  I plan to spray her again when the weather is better and will also spray her with a sealant. 

 I just stuck in this chenille plant to see what she will look like with "hair". I think I will put some succulents because they grow slow and are super simple to take care of. 

There's something about her that reminds me of the Bird girl of Savannah.  Something sweet and wistful. 

So now I have yet another thing to keep an eye out for while yard saling! Here's hoping I have a cool collection of them by the end of summer.  And if I plant succulents in them, they will just lay dormant during the winter and come back to life again in the spring.

I hope you like my first post in months. I've got some other projects that I have in mind to work on. Again, thanks for stopping by to visit. 

Happy Crafting!

Monday, March 26, 2012

Day of the Dead Sugar Skulls Craft A Week #27

I think religious iconography is fascinating. I love how different cultures interpret and convey their religious beliefs. I grew up in Southern California and, while I was not raised Catholic, I have a strong appreciation for Catholic artistic interpretation of religious symbols. I've always thought that Sugar Skulls for the Day of the Dead are particularly cool.

If you aren't familar with the Day of the Dead, it is a National Mexican holiday that takes place on November 1-2. The holiday focuses on praying for and remembering friends and family members who have died. For more information on Day of the Dead, please go to Mexican Sugar Skull.

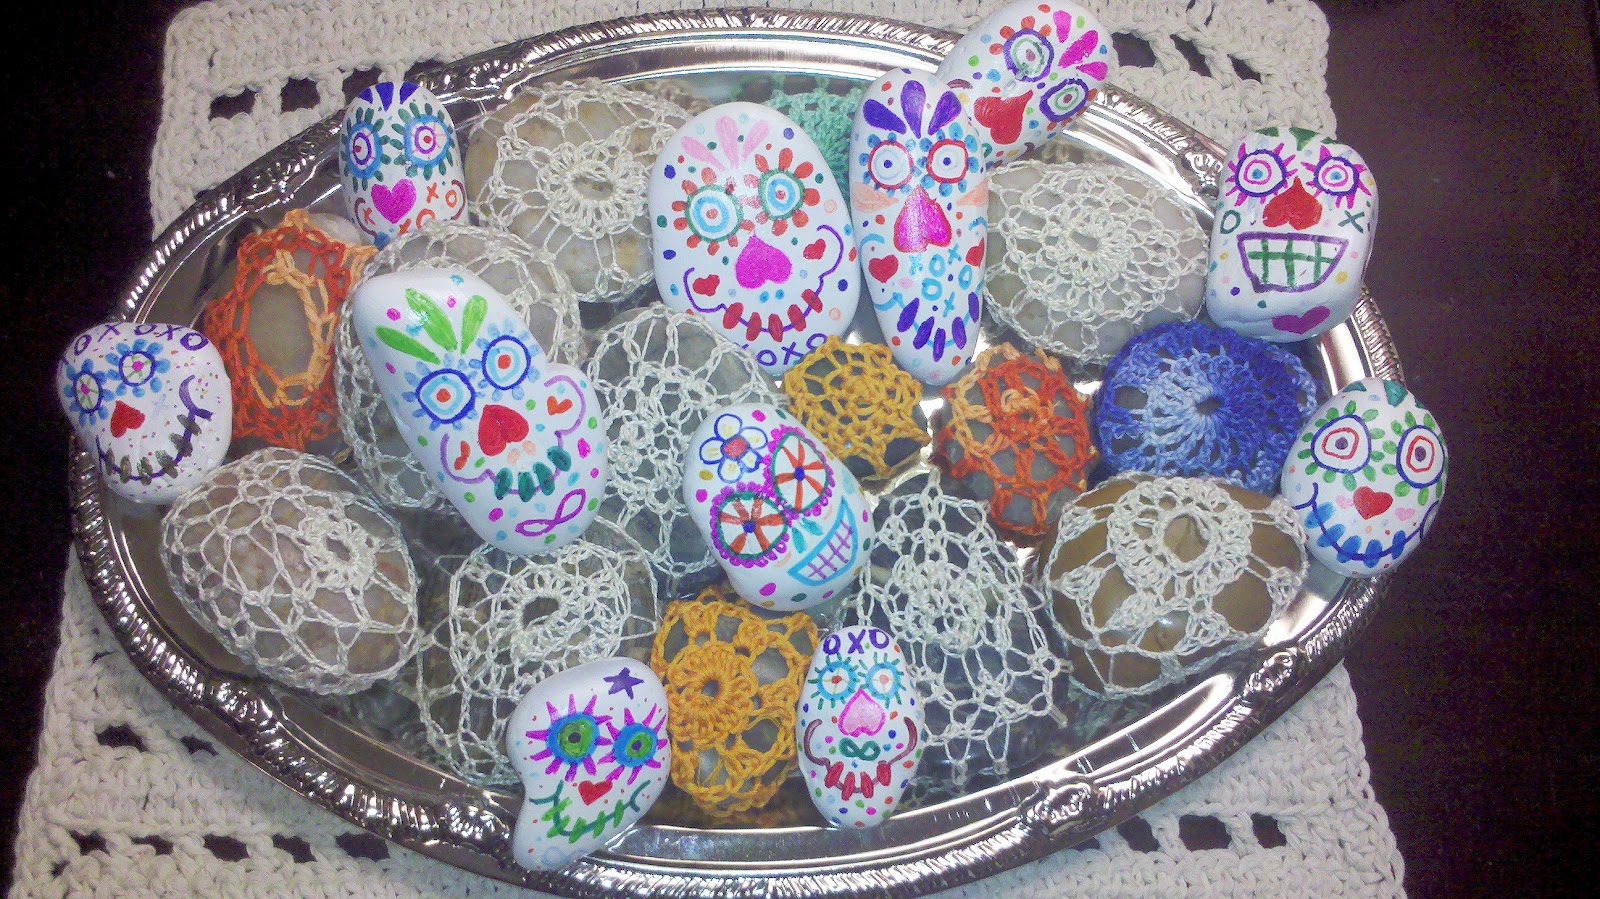
One of the traditions that occurs during Day of the Dead is honoring lost loved ones with Sugar Skulls. These are supposed to represent those who have passed.  While they are traditionally made from sugar (hence the name Sugar Skulls), I made some out of painted rocks. I think they will make nice worry stones.  What do you think?


This is a picture of my Sugar Skull and crocheted rocks. It's getting a little crowded on here; think it's time to do some gifting. (Cydnee, which is your favorite?)

Happy Crafting!

Friday, March 9, 2012

My Etsy Shop is Finally Open For Business!

Clearly I've been on a crafting mission as of late. Part of my motivation is that I just love to do crafts; it really is how I express myself. Some people write, other people paint.  Me, I craft. If you've read and followed this blog, you know I've created alot of things. While I am sure my friends and family LOVE receiving my home made goodness, there's a limit.  (Seriously, how many hand crocheted animals can one kid have)?

Thanks to the wonderful encouragement I've received from friends, I decided to open my own Etsy shop. I only have a few things listed right now but there will be more to come. If you (or anyone else you know) wants me to make something particular, please let me know. You know I'm happy to do custom orders.

Here's the link to my shop:  Ant Bea Etsy Shop.  Come visit my shop!

Thursday, February 23, 2012

Craft A Week #15 Crocheted Stones

Yes, it has been awhile since I've posted (thanks for reminding me Ariel). I haven't been crafting too much lately because of work responsibilities (and Pinterest). I have actually made several things that came from Pinning but none that were really postworthy.

That is until making these crocheted stone covers. I know it sounds strange but they look pretty cool. (The grandkids called them sweaters for rocks). Whatever you call them, I love the juxtaposition of the thread against the stones. They are pretty and different. And super easy and quick to make.


Aren't they pretty? I have them in a tray on the counter but I think singularly they would make a nice gift (as paper weight?). 

I got the idea from this site (Purlbee.com) but I didn't really follow her instructions. If you know how to crochet, all you need to do is start with a ring and go from there. That was the real fun part of this project; the randomness of creation. I just started crocheting and then found the rock that fit best. As I said, super simple.

I will try to be more diligent in posting. It's hard to call posts "Craft a Week" when I don't post weekly!  If you sign up as a follower or via email, you will automatically get an email when I publish a new post. 

Happy Crafting!


Sunday, January 15, 2012

Craft a Week #12: Revamped Plant Lamp

What a busy day I've had! I did some major cleaning today: scrubbed floors and cupboards, put all the leftover Christmas stuff away, cleaned up the dining room, etc. In addition to that, I finally painted the floor lamp I have sustaining a lovely plant that lives in my entryway. It's been on my to do list since September so I'm thrilled to cross it off!

I love (need) to have plants growing in the house during the fall/winter. Sadly, my house doesn't have many places that have the right light. During the summer months I grow lovely and lush plants on the deck. When the weather turns cool I bring those plants in the house and try to nurse them along til they can make it back outside again in the spring. Some years they just barely make it so this year I was determined to try something different.

I found this 1950/60's lamp at a yard sale that  think I got for free. While I knew it could serve my purposes, it really didn't fit my house style.  Since it is in my entryway, I knew it needed a revamp.


Here's my finished product:


Amazing what a couple coats of paint will do!  I'm on a mission to use the supplies I have on hand so I used the rust colored paint I already had. You can't tell from this picture but after a few coats of that, I sprayed with a textured tan color that I also had in the cupboard. It really gives the final project a layered look of depth that these pictures don't do justice.


Here's the lamp in action!  And, fyi, you don't need to buy those expensive plant lamp bulbs (I've done that in the past). These are just regular bulbs. Think about it: Plants in offices tend to grow beautifully and thoselights aren't anything special.  I usually turn the lights on when I leave for class in the afternoon (around 2 p.m.) and turn off when I go upstairs to bed. It serves two purposes; gives the plant light and makes it so I don't have to come home to a dark house.


Doesn't the plant look great?! Super happy and healthy.

Thursday, December 15, 2011

Ode to Bailey Kitty (via crochet)


The day before Thanksgiving our family cat, Bailey, passed away. Though it wasn't totally unexpected (he was 14years old and really started to slow down the last few years), it was still a great loss. He's the last of our family pets. He was a dear, sweet friend and I miss him incredibly. 


Isn't he cute?  Such a sweetie


So what do I do to work through my grief? Why crochet, of course.  Actually, right before he passed, I started on a stuffed Bailey kitty as a gift for Jasmine (my granddaughter). She loved him very much and every time I talk to her, she asked about Bailey (she lives 8 hours away from me).  I wanted to give her a Bailey that she could take home with her.  Because Bailey was always a big fan of the nap, I made her a sleeping kitty.


While this one is cute, it was waaaaayyyyy too skinny to represent Bailey.  So I made another.


This one does represent the fat cat that was Bailey, I still think it's still missing some of the essence of what made Bailey, Bailey.


They do look cute together though, don't they?  I'll let Jasmine decide which she feels represents our man Bailey the best. 

(Sorry, I don't know what patterns I used for these).

Friday, December 2, 2011

These Are A Few of My Favorite Things (Crafting Websites)

My friends and family ask me where I come up with my creative craft ideas. While I am pretty crafty in my own right, I get ALOT of ideas from other craft websites.  I can spend hours upon hours trolling the net seeking out innovative inspiration.  The following are some of my favorites:

Design*Sponge

Design*Sponge is a design blog run by Brooklyn-based writer, Grace Bonney. My favorite sections of this blog are the DIY and the Before/After sections.  Many of the projects listed here are definately for the more advanced crafter (who has carpentary skills). But they are also the most spectacular projects I've seen. Given my limited experiece with power tools, most of these projects go in my "some day" folder. It's not that they are hard; I just don't really know what I'm doing with that kind of equipment.  Definately worth exploring.  Design Sponge


I LOVE this site!  Ravelry is a free, member generated site dedicated to fiber arts (crocheting, knitting, etc.). They have many free patterns, instructions, and how to's (both video and print). This is one of the first sites I go to when trying to find a new crochet idea.  Ravelry


This is another free, member generated craft site. Members can post on any craft topic. As with Ravelry, alot of the projects include instructions (or links to them. We crafters are an unselfish bunch, aren't we?!). They also have articles relating to crafting, as well as periodic crafting contests.  The only downside with this site is that signing up for membership seems to be a bit of a challenging process.  In any case, it is a very fun site!  In fact, I entered their toy making contest solely on the hopes of winning something with their logo on!  I love their humor.  Craftster


Another free, member generated site. Amazing ideas here!  I am just so amazed at the creativy and innovation that crafters have. Most have instructions. A great way to waste time and get inspired.  Craftgawker


I just found this site, thanks to my dear friend Denise. This place is amazing!  They have a whole host of topics that people post under but my favorite is the DIY  & Crafts section. Many of the postings include instructions (which is always a plus). You can find ANYTHING here!  Guaranteed to give you inspiration for whatever you are in the mood to do!  Pinterest

I'm sure there are many more crafting sites out there. If you have any favorites, please share them in the comments section.  Happy crafting!

Craft A Week #1: Wonky Donkeys

I'm adding a new section to the blog titled "Craft a Week".  If you know me, you know that I do LOTS of crafts but things don't always end up posted here on Random Bits. I figure if I have this section, it will keep me accountable and I get to share the fun things I'm working on. (One of my New Year's resolutions is to get my crafting out to the world; I do some cool stuff but am not always the best at self promotion).  I will try to post instructions along with the project (given my time limits). If there is ever something I make that doesn't have instructions, please let me know and I will do my best to get them to you.

This first entry is called "Wonky Donkeys".  I created it in response to the call for home crafted toys contest at www.craftser.org.  I love this site and find alot of inspiration (and instructions) there.  I especially like their merchandise.  One of my favorite slogans is "Craftster: Rock is Dead; Long Live Paper and Scissors" (a little crafting humor - and yes, I am a Craft Geek)!

The link to my entry is here:  Wonky Donkeys: Vote for Me!  You will need to sign up for Craftser in order to vote and I appreciate your time and attention if you do.  (The entry also has a link to the pattern I used as the foundation for my donkeys). 

Thanks in advance for voting. Happy Crafting! 


Aren't they cute?!  They look so in love!


Donkey #1


Donkey #2

Friday, October 21, 2011

Spool Book Shelf

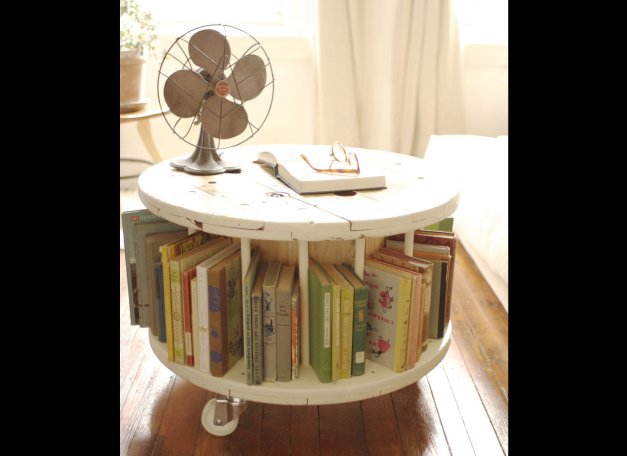
Another great idea from "Design Spounge" is this bookshelf made from a discarded wooden spool. I'd love to have this in my spare room where the grandkids stay but have no clue where to find one of these spools. If anyone has a lead on one, please let me know.

Dresser ReDo

You know I love to reuse and repurpose. I found this great idea for redoing an old dresser on "Design Spounge" (one of my favorite sites for design inspiration.  I love how just adding the legs really makes this totally new piece. Amazing!

Before and After Cabinet


Saturday, September 17, 2011

Random Bits of Goodness Mirror

Those who know me understand that I truly enjoy kids, toys, and crafts. I love my grandchildren (and their friends, and my neighbor's kids). Our family has six children between the ages of 3 and 9 (and another sweet little baby joining us in March 2012). 

Five of our six children are within 2 years of each other so they've gone through the same developmental cycles around the same time. That means I've got alot of little plastic toys all over my house! Now that the most of the kids have outgrown them, I was on the lookout for something to do with all the residual playthings. (Obviously, I wasn't about to just toss the stuff out).  I came upon this very cool project!

The good people at the website "Can't Stop Making Things" (don't you love that name?!) gave me a solution. They call it a Faux Metal Mirror. I call it Random Bits of Goodness! I love all the little chachke that comes with little kids. This project gave me a great way to recycle, save and display toys that would otherwise have been thrown away.

It's a proces, so bear with me!

Supplies:

  • Artist Canvas (mine is 16" x 20")
  • Mirror tile (mine is 12" x 12")
  • Lots of discarded plastic toys, or anything in your junk drawer (mine took alot. I knew there was a reason I saved all those KinderEgg toys)!
  • Liquid Nails glue
  • Spray paint for plastic (I bought pink because it was on sale at Ollie's for .99)
  • Primer spray paint (I used rust color)
  • Copper Metal & Patina Glaze by Valspar
  • Antiquing Glaze by Valspar
  • Clear spray

Tools
  • Masking tape
  • Paint brush
  • Clean cloth (to apply the Antiquing Glaze)

Note: "Can's Stop Making Things" said to use Copper Topper but I couldn't find it locally so I substituted the Valspar products.


This is what I started with. I centered and glued the mirror onto the canvas.


Glue all the goodies onto the canvas, around the mirror.


Here's a close up. This was a process for me. I put things where I thought I wanted them but let it sit overnight before glueing in place. I'm glad I did because I changed some things. When you are satisfied with your placement, glue them into place.


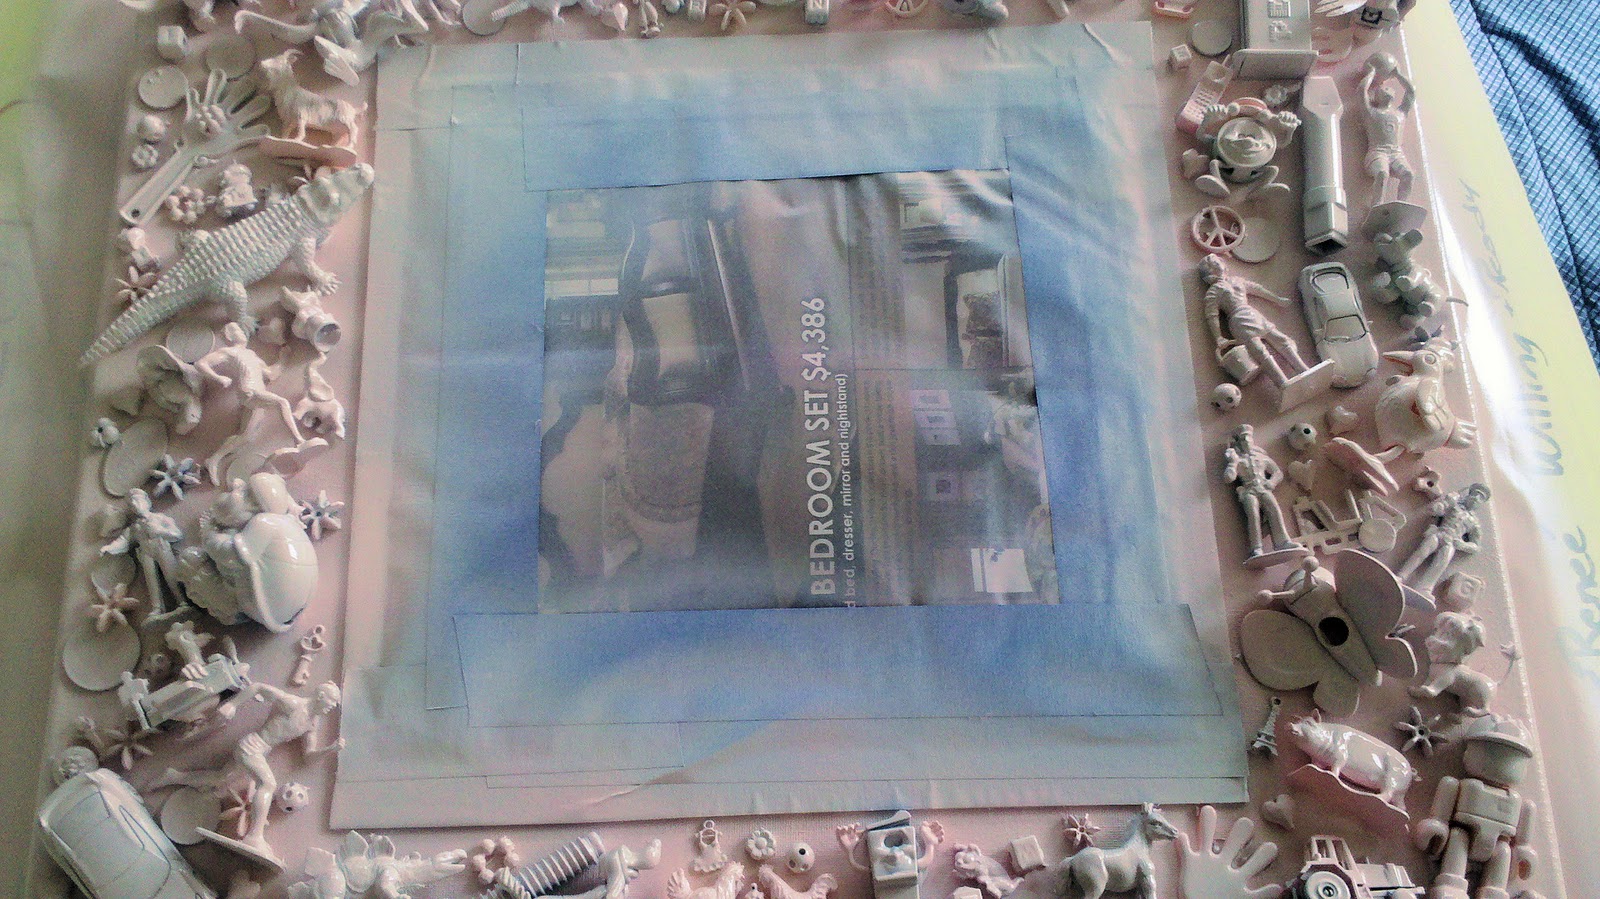
Tape off the mirror. Spray paint with a paint made for plastic. The color doesn't matter. (Mine was pink). This coat is just so the true base coat will adhere appropriately. Apparently it will stick better if all pieces are covered in the plastic paint. I used several light coats to make sure everything was covered without dripping.


Allow to completely dry. Once that is done, spray with the rust primer.  Again, use light coats but make sure to completely cover all sides of the objects with the paint.


The Valspar product says to allow the base coat to dry at least 4 hours before using. This was a total test of patience for me as I really wanted to see the completed project!


The next step was to apply the copper glaze. I put two coats on, allowing the first coat to dry before applying the second. While the second coat is still wet, I applied the antiqueing glaze. I let it dry overnight and then sprayed with the sealer.


Viola! My completed project!  I absolutely love how it came out! I don't think the pictures really do it justice. I'm still waiting for the sealer to dry and I will take more pictures later. Looks like metal, right?! I was going to hang this in my spare bedroom but I love it so much I think I will hang in the living room.


Since this came out so well, I'm going to make another picture. I'm interested in religious iconography and think I shall do one with crosses and angels. Stay tuned!

Wednesday, September 7, 2011

Recycled Clothes to Dog Toy

I have a big back of clothes that I was planning to take to Goodwill, however, I think I will use most of the stuff for this dog toy.


It is super easy: Just cut old t-shirts into 1" x 20" strips, braid/twist together, and knot at the ends. How simple is that?!  I think I've found Christmast gifts for all my dog family/friends.  If you want to make these yourself, here's the link:  Recycled Dog Toy.  I will post pictures after I get some made.

UPDATE:

Here's one of the shirts I started with.  It was one that all 3 of the grandboys wore and have now outgrown.  From this, I followed the directions from the link above: Cut 20 1" x 20" strips.  I then knotted and twisted the strips.


This is what I got:                                                          Clearly, Marcella loves it!


While this was good for her (since she's a medium/large dog), I wanted something different for Frank and Beans (because they are small). I adjusted the instructions:  1) Cut 20 1" x 12" strips.   2) Divided those strips into 2 groups of 10.  3) Knotted one end TIGHT and continued to tightly knot the strips. (I thought this would hold together better than just twisting).  4) I also knotted the loose ends so it would stay together better.

Here's my modified dog toy:


I think this is perfect for small dogs. It's about 7" long and pretty sturdy.  Now if the rain ever stops I can run my treat box to the post office. Be on the lookout boys for goodies for Ant Bea!

September 14, 2011 Update: 
The boys with their toys! Aren't they too cute?!