Pinterest

Follow Me on Pinterest

Friday, December 30, 2011

Craft a Week #8: Tagxedo Revisit

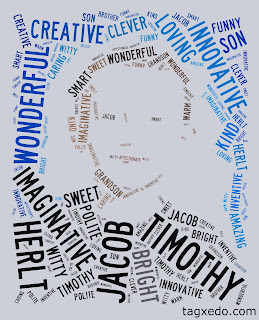
A few weeks ago I wrote a post on the website Tagxedo. I did a quick word picture then but wanted to go back and revisit the site. I made the coolest pictures of four of my grandkids!  Here they are:


DeAndre


Timbo

Nat

Jas

I so love how these came out! I printed them out on good paper in high resolution and framed them. (They are currently on my mantle and will eventually make their way to their permanent space in the spare room). I also made copies for their Moms. These would make a wonderful Mother's/Father's Day gift!

Lesson learned: School photo head shots work really well for this project. This may be one of my new favorite (and easy) projects.

Happy Crafting!


Saturday, December 17, 2011

Craft a Week #7: Crocheted Pirate Slippers

As a follow up to yesterday's slipper entry, today's project is this adorable pair of pirate slippers. I made them for my yet unborn grandson, Marcus Robert (aka BHBB), who is not due till late March. I wanted to make him a Christmas gift and these seemed like the perfect thing.  I love how they are not the traditional baby slippers. They are kind of cool and edgy. (They remind me of Wallabees - remember them)?!

I followed this pattern: Pirate Feet.  While they are really cute, I'm not sure how practical they are. I'd like to see these in actual use.  (They seem like they would fall off easily). I would have liked them to be smaller (they are supposed to be for 9-12 months and I really wanted 6 months). I tried to make them smaller by using an F hook but they are still rather large.  I think I will play with the pattern some and see how I can alter it while still keeping the general idea.

They were really quick and easy to do though.  Happy Crafting!


Friday, December 16, 2011

Craft a Week #6: Crocheted Slippers

I was looking for a little extra gift to give my Mom for Christmas and decided I wanted to make bedroom slippers.  I trolled the net and found the following pattern that was super easy and worked up quickly. The link to the pattern is here:  Zoom Yummy Simple Crochet Slippers.  (They really are simple).

I thought they were way too plain so I added a flower that I found here: Little Flowers.

Since I'm on a mission to not buy new materials, I used yarn that I had around the house.  I used Naturally Caron Country. I love the feel of this yarn. It's nice to work with and makes a nice product. 


Cute, right?  I may be cranking these out so if you get them for a Christmas gift, act surprised!

Happy Crafting!

Thursday, December 15, 2011

Christmas on a Budget

I know we all are on a budget this year (yet again). We all know the traditional budgetary gifts (making breads, cookies, candies, etc). but I was thinking of more creative options this year.  Here's some of the top gifts that I'm giving this year.

1.  Daffodil bulbs. Here in Central PA, the winter months can get rather gloomy.  I love to give this gift as it has the promise of spring built right into it. (And the price is right)! 

I had a pack of daffodil bulbs in my garage refrigerator that I got last spring for free.  They were a give away from one of those bulb catalogues.  (I know our Walmart has some spring bulbs out now so you can still get them). I bought the glasses and decorative rocks at the Dollar Store.  So my out of pocket cost for each of these is about $1.33. 


Super easy to make too:  Put a few rocks in the bottom of the glass. Place the bulb in the glass and put stones around it. Add about an inch of water, put in a sunny window, and in 6 weeks or so you will have a bloom.   Who wouldn't love to receive this as a gift?


2. Books, books, books.  Most everyone I know loves to read but the cost of most new books tends to knock that gift option off my list. I've learned to keep my eyes open though as you never know where you can find some pretty amazing books.  Case in point:


I got these books (and more) from the Dollar Store (new) and the library (used). They were the perfect fit for at least 6 people on my gift list.  I also check out the books section at thrift shops.  If you keep your eyes open, you never know what you will find.

3.  Vintage t-shirts.  I traveled some in 2011 (Toronto and Los Angeles) and in each city, I made a point to hit up thrift shops. I found some AMAZING treasures!  I picked up 20 or more t-shirts in L.A. that I'm giving for Christmas gifts.  I got Lakers, Dodgers and Raiders, as well as some just plain cool shirts (Jesus is my Homie; Bad Ass Coffee Company).  I didn't spend more than $4 on each shirt (average cost was $3).  They are sure to be a big hit.  (Sorry, no pictures as they are already wrapped). Trust me, it's worth a trip to the thrift shop.

I know not everyone likes to bargain shop like I do. But if you want to save money, you've got to buy throughout the year.  I buy when things are on sale and keep for Christmas. (The hardest thing to do is not give someone their gift early, however, it really defeats the purpose of saving if you give someone their gift in August. Believe me, you will be out buying them another gift - and spending twice as much).

What creative ways are you using in gift giving this year?

Ode to Bailey Kitty (via crochet)


The day before Thanksgiving our family cat, Bailey, passed away. Though it wasn't totally unexpected (he was 14years old and really started to slow down the last few years), it was still a great loss. He's the last of our family pets. He was a dear, sweet friend and I miss him incredibly. 


Isn't he cute?  Such a sweetie


So what do I do to work through my grief? Why crochet, of course.  Actually, right before he passed, I started on a stuffed Bailey kitty as a gift for Jasmine (my granddaughter). She loved him very much and every time I talk to her, she asked about Bailey (she lives 8 hours away from me).  I wanted to give her a Bailey that she could take home with her.  Because Bailey was always a big fan of the nap, I made her a sleeping kitty.


While this one is cute, it was waaaaayyyyy too skinny to represent Bailey.  So I made another.


This one does represent the fat cat that was Bailey, I still think it's still missing some of the essence of what made Bailey, Bailey.


They do look cute together though, don't they?  I'll let Jasmine decide which she feels represents our man Bailey the best. 

(Sorry, I don't know what patterns I used for these).

Sunday, December 11, 2011

Craft A Week #5: Natalie's Lalaloopsy Christmas Gift

Here's Nattie's Christmas gift (one of them anyway). I think she came out beautifully. She may be one of my all time favorite things I've ever made. I will call her Cotton Candy because her hair looks fluffy(the pictures don't do her justice).


Isn't she adorable?!


The back of her head. It's all ringlets.


Thursday, December 8, 2011

Craft a Week #4: Tagxedo Word Picture

Man, I am on a roll this week!  I found this great site that allows you to upload pictures AND words, which then makes the words become the picture. So very cool.  The site is Tagxedo.  The program pretty easy to use and self explanatory. 

I think the greatest challenge is finding the right picture to use. My first one was a picture of Jasmine.  I used this photo:

I used this picture because it was a head shot and I thought it would work best.  First I uploaded the picture.  (Go to "Options" and click on "Shapes". Once there, either use a shape they already provide or upload a picture under the "Add Image" on the bottom right. 

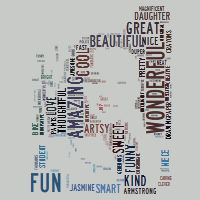
Then I went into Word and typed in as many words as I could think of that made me think of her. I used words like amazing, funny, smart, creative, beautiful, daughter, sister, granddaughter, (her name), etc. When I got stuck I highlighted a word I already used and looked up synonyms.  Once I had a bunch of words, I saved it as a "txt" document so I could upload on the Tagxedo site.  To do this, go to the "Words" tab, and click "Load". Once there, click on the "File Browse" tab and upload your word file there.

And voila! your word picture is created. You may have to play around with some of the settings (under the "Word Layout" tab).  Once done, make sure to save your final document.   Maybe there's a way, but I could only figure out how to save a thumbnail on my computer.  The larger word picture does save on the Tagxedo site but I wanted to be able to save and play with it as a picture on my C drive. 

Here's my final product:

I don't like this Polly Pocket version because you can't see the actual shading of her face that compliments the photo (and really helps define it).  It does print out okay though. I think I'm going to work on these for the grandkids: print, frame, and hang in the spare bedroom. That way when they come to spend the night, they can see how their Gam really feels about them (lots and lots of love). 

You can also chose a shape, link a website, and create a word picture. Here's my RBG Word Picture:


I think this is a very cool site and worth playing with. Who wouldn't love a gift of a word picture that lets people know how much you love them?! And it allows me to do two of my favorite things at once: writing and crafting!

Happy Crafting

Tuesday, December 6, 2011

Craft A Week #3: Photo Canvas

Tis the time of year for me to get pretty crafty so I am onto my second craft project this week.  Today's craft is a photo canvas.  SHANA:  If you are reading this stop here!  This is one of your birthday presents! 

Here's my picture:


(It's still drying so it will smoothe out as it drys). If you can't read the quote from the picture, it says:

Watch with glittering eyes the whole world around you because the greatest secrets are always hidden in the most unlikely places. Those who don’t believe in magic will never find it.
Roald Dahl
I thought the quote fit PERFECTLY with this picture. Yes, I too agree that it looks like the quote is eating her face (thanks Bre) but it was based on this original photo. This picture has always been one of my favorites. (Shana is a good photographer, isn't she)?


This project sounds simple but it was rather a challenge. I found other people online who came up with the idea of printing a photo onto tissue paper which then, in turn, is Mod Podged onto a blank canvas. Sounds simple, right?  Well it's not that simple. 

No matter what I did the paper kept getting stuck in the printer.  I did have limited success by ironing my tissue paper and then taping it onto light cardstock paper.  I cut it 4" larger than the cardstock, wrapped it around the back, ironed that flat, and taped the whole thing down.  (Sorry, I didn't take pictures).  Even with doing all that the page got stuck 3/4 of the way through printing - which was okay because that's all I needed.


I then took the printed tissue and carefully cut it away from the cardstock. I used the canvas as a guide and cut it to size.  I then put a light coating of Mod Podge on the canvas.  I VERY carefully lined up the picture and, starting from the center, smoothed the photo onto the canvas.  This is the tricky part because you want to try and get as many bubbles out (not that easy).  Once that is done, just let it sit and dry for 30 minutes.


Because my photo wasn't as wide as the canvas I felt the picture needed something to blend it with the canvas. I used watered down blue water color to marry the two and let that dry 20 minutes. While that was drying, I found and printed the quote. I printed this on regular paper because I didn't want to bother with the tissue anymore.  I played with the spacing and, once I was satisfied, I Mod Podged that in place too.  I then put a thin coat of Mod Podge over the entire thing.

I let that dry for 15 minutes and very lightly sprinkled glitter for highlights.  I'm still feeling it needs something but I'm not sure what. I don't want to add too much to it because once added, it can't be removed.  Any suggestions?

All in all, I think this project is just okay. I like my final product but the printing issue was so frustrating it totally turned me off.  Considering you can get these done at WalMart and other photo places for $15-20, I think I'd rather do my photoshop magic and send it to them for printing. 

Happy Crafting!

Craft A Week #2: Lalaloopsy Doll

I am in the throws of toy making for the holidays.  This week's craft project was a crocheted Lalaloopsy doll.  If you aren't familiar with Loopsey dolls, here's what they look like:


The original Loopsy doll is made by MGA Entertainment. The story of Lalaloopsy is, “they were once rag dolls that magically came to life when their very last stitch was sewn.” In the story, each doll is made from fabric and takes on the personality of the fabric from which they have been made.

They have big heads, skinny bodies, arms, and legs. They also have awesome hair!  Since I don't know how to sew I decided to try a crocheted version.  (I did find a pattern online but it was of very little help. I had to totally rework it to be of any use. I will write out the instructions for the next one I make).

Here's my first Lalaloopsy endevor:


Since I was making this for a toddler, I made the eyes and cheeks out of crochet.I didn't want to glue anything on or use buttons that could be pulled off. I also added a nose because I know it is confusing for little people who are just learning about facial recognition when pieces are missing.  I also put  pipe cleaners in her arms and legs so she can be posed.


She's a pretty good size; about 18" long. 


I also found a website that is called the "Unofficial Lalaloopsy Doll Website" that will definately be a source of inspiration for me and my future Loopsy doll making.  Here's the link:  Lalaloopy Headquarters

I want to make one for Natalie (who is 4) and I think I will use felt for the cheeks and buttons for the eyes. Since she's a big girl, if the eyes do come off, she won't try to swallow them (hopefully)!

The first version of anything I make is just about getting the mechanics down. I'm looking forward to making more of these. She was very fun to create!


Friday, December 2, 2011

These Are A Few of My Favorite Things (Crafting Websites)

My friends and family ask me where I come up with my creative craft ideas. While I am pretty crafty in my own right, I get ALOT of ideas from other craft websites.  I can spend hours upon hours trolling the net seeking out innovative inspiration.  The following are some of my favorites:

Design*Sponge

Design*Sponge is a design blog run by Brooklyn-based writer, Grace Bonney. My favorite sections of this blog are the DIY and the Before/After sections.  Many of the projects listed here are definately for the more advanced crafter (who has carpentary skills). But they are also the most spectacular projects I've seen. Given my limited experiece with power tools, most of these projects go in my "some day" folder. It's not that they are hard; I just don't really know what I'm doing with that kind of equipment.  Definately worth exploring.  Design Sponge


I LOVE this site!  Ravelry is a free, member generated site dedicated to fiber arts (crocheting, knitting, etc.). They have many free patterns, instructions, and how to's (both video and print). This is one of the first sites I go to when trying to find a new crochet idea.  Ravelry


This is another free, member generated craft site. Members can post on any craft topic. As with Ravelry, alot of the projects include instructions (or links to them. We crafters are an unselfish bunch, aren't we?!). They also have articles relating to crafting, as well as periodic crafting contests.  The only downside with this site is that signing up for membership seems to be a bit of a challenging process.  In any case, it is a very fun site!  In fact, I entered their toy making contest solely on the hopes of winning something with their logo on!  I love their humor.  Craftster


Another free, member generated site. Amazing ideas here!  I am just so amazed at the creativy and innovation that crafters have. Most have instructions. A great way to waste time and get inspired.  Craftgawker


I just found this site, thanks to my dear friend Denise. This place is amazing!  They have a whole host of topics that people post under but my favorite is the DIY  & Crafts section. Many of the postings include instructions (which is always a plus). You can find ANYTHING here!  Guaranteed to give you inspiration for whatever you are in the mood to do!  Pinterest

I'm sure there are many more crafting sites out there. If you have any favorites, please share them in the comments section.  Happy crafting!

Craft A Week #1: Wonky Donkeys

I'm adding a new section to the blog titled "Craft a Week".  If you know me, you know that I do LOTS of crafts but things don't always end up posted here on Random Bits. I figure if I have this section, it will keep me accountable and I get to share the fun things I'm working on. (One of my New Year's resolutions is to get my crafting out to the world; I do some cool stuff but am not always the best at self promotion).  I will try to post instructions along with the project (given my time limits). If there is ever something I make that doesn't have instructions, please let me know and I will do my best to get them to you.

This first entry is called "Wonky Donkeys".  I created it in response to the call for home crafted toys contest at www.craftser.org.  I love this site and find alot of inspiration (and instructions) there.  I especially like their merchandise.  One of my favorite slogans is "Craftster: Rock is Dead; Long Live Paper and Scissors" (a little crafting humor - and yes, I am a Craft Geek)!

The link to my entry is here:  Wonky Donkeys: Vote for Me!  You will need to sign up for Craftser in order to vote and I appreciate your time and attention if you do.  (The entry also has a link to the pattern I used as the foundation for my donkeys). 

Thanks in advance for voting. Happy Crafting! 


Aren't they cute?!  They look so in love!


Donkey #1


Donkey #2