Pinterest

Follow Me on Pinterest
Showing posts with label recipe. Show all posts

Friday, August 2, 2013

Making Sushi at Home

As you know, I am loving spending time with the grandkids this summer. While I was trying to figure out what to make for dinner one night this week, my wonderful, creative, nine year old Tim came up with a great idea. Let's make sushi!  Challenge accepted and (back) to the store we went!

Before I start with the recipe and pictures, let me say that this is really easy to do and great for different age groups. I had a 5, 9, and 11 year old make their own sushi and it was Super Simple! 

Here is what you will need. I found everything at Wegman's and I'm sure Whole Foods or Trader Joe's would readily have this stuff too.

  • Bamboo rolling mat. I found these in the Asian food aisle at Wegmans. They were only  $1.49 each.
  • Two packs of 10 toasted nori sheets. Found in Asian food aisle as well.
  • One box of sushi rice - be sure it says sushi rice.
  • Rice vinegar
  • Sugar
  • Salt
  • Fillings of your choice - here is where you can get creative. We used cucumber, carrot, red pepper and imitation crab legs. 
Step 1: Make sushi rice

The key to making sushi is to be sure you get the correct rice. You will need sushi rice. Look in the rice section. I found a 3 cup box there for $3.99. (I know, seemed pricey to me too until I realized it makes ALOT of sushi).

I followed Alton Brown's recipe for cooking sushi rice.  Here it is:

Ingredients

    3 cups sushi or short grain rice
    3 cups water, plus extra for rinsing rice
    3 tablespoons rice vinegar
    3 tablespoons sugar
    1.5 tablespoon kosher salt

Directions

Place the rice into a mixing bowl and cover with cool water. Swirl the rice in the water, pour off and repeat 2 to 3 times or until the water is clear.

Place the rice and 3 cups of water into a medium saucepan and place over high heat. Bring to a boil, uncovered. Once it begins to boil, reduce the heat to the lowest setting and cover. Cook for 15 minutes. Remove from the heat and let stand, covered, for 10 minutes.

Combine the rice vinegar, sugar and salt in a small bowl and heat in the microwave on high for 30 to 45 seconds. Transfer the rice into a large wooden or glass mixing bowl and add the vinegar mixture. Fold thoroughly to combine and coat each grain of rice with the mixture. Refrigerate for several hours until completely cooled.
 
Step two: Matchstick cut your veggies and get your stuffing in order
 
This step was the most labor intensive (because I was doing it by myself). You want these to be matchstick thin so they fit nicely into the roll. I used imitation crab legs for the main component which was great because it was the right shape, albeit a tad bit short for the wrapper. It really made it easy to roll and wrap.  If you were doing this with other adults, you could have everyone cut up something specific and that task would be done in 10 minutes.
 

Step three: Set up your work space

 These are the nori sheets.

 These are the mats.
 
You will also need a bowl of water to put your hands in before you handle the rice (so it doesn't stick).
 
Construct your sushi
 
Place one sheet of nori and put it smooth side down on the bamboo mat. Wet your hands, pick up some rice and spread it on the lower 1/3 of the nori. With your fingers, press it down gently.  Don't overstuff or it will all fall out when you start to roll. You want it to be firm but not heavy. The rice should be about 1/4 of an inch in height.
 
Add your fillings in the center of the rice and gently press down.  Always put down the biggest fillings first. In our case it was the crab leg. put smaller fillings on top or on the sides.  It will seem like you don't have enough in there but, trust me, this is plenty.
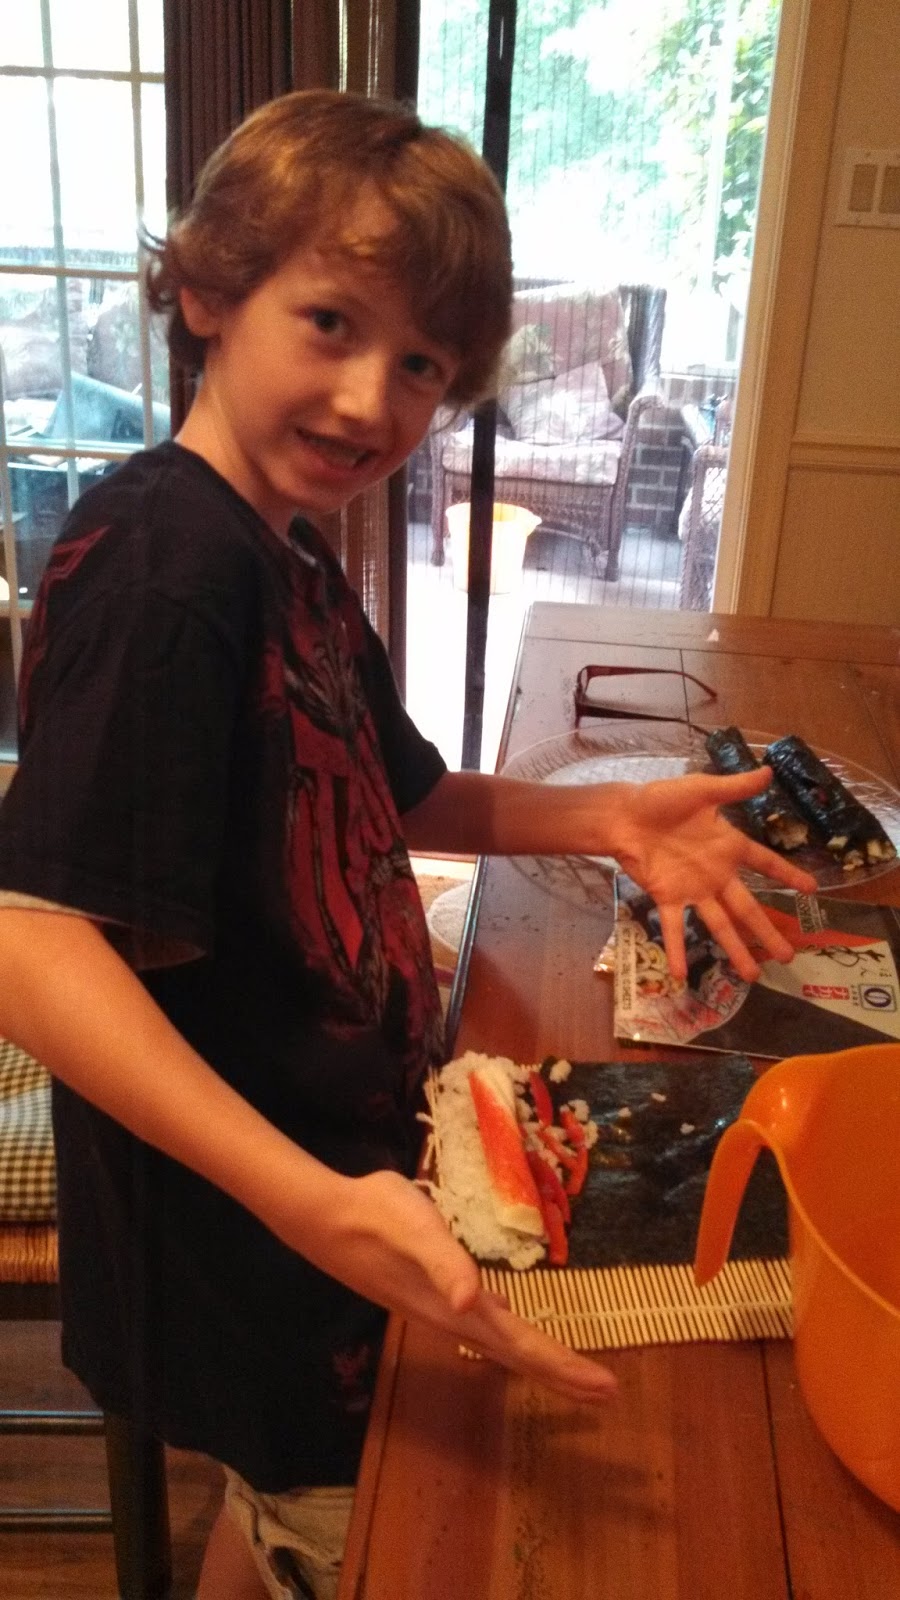
 
 
Now comes the fun part. Rolling! Lift the end of the bamboo mat that is nearest to you and fold it over the ingredients. Make sure not to roll the mat up into your sushi roll! After you have rolled at least one full rotation, dip your fingers in the water and lightly moisten the top end of the nori sheet that is furthest away from you. Gently fold the roll into the end of the nori (the part you just moistened) and seal the roll. Squeeze the roll gently with your hands and with the palms of your hands, roll it back and forth between the fold of the bamboo mat to make sure the roll has sealed and to help shape it.  (I found this to be the part the kids had the hardest time with; to make sure they don't press too hard and force everything out).

Ta Da! Here's our sushi!  What a sense of accomplishment! We had PLENTY of extra rice and veggies (ran out of crab). While we made 10 sushi rolls, we easily have enough for 20. I put the extra ingredients in the fridge and we will get more crab today to make again.

 
I put the whole rolls in the fridge for about an hour to set up before I cut them. It really is that simple! For some reason I always thought sushi would be hard to make. Turns out, I was wrong! 

Now slice each sushi roll into 8 pieces. Use a sharp knife to get a clear cut. Serve with sauces (soy, wasabi, yum-yum, whatever you want).


While I am not a huge fan of sushi, I will admit this was really good. I had to use quite a bit of sauce to make it palatable for me but it was the best sushi I've had!

This would be a neat project to do with adults too. We all felt we really accomplished something by making sushi. I am sure adults would enjoy this as well.

Hope you enjoy this Super Simple Recipe!

Tuesday, July 30, 2013

Homemade Taco Seasoning and Taco Cupcakes

This summer I've lived out my fantasy of being a stay at home (grand) mom.  I didn't teach any summer classes this year so I've been technically off work since May. While I have been doing some great consulting work and prepping for fall classes, much of these last several months has been child focused. Most weeks I've had at least one (or three) grandkids staying with me. I've really loved the time with all of them.  Here's some of our bunch. Aren't they great?!


One of the most exhausting things about having kids around is the amount (and times) they eat! Seriously, it feels like they just get done with breakfast and are ready to eat lunch! I love to cook but really hate having to think about food constantly. I like to make things that can serve as more than one meal (and with as little serving effort on my part). Fortunately they are all pretty good eaters and are open to trying different things. Hence, taco cupcakes were born! Another Super Simple recipe!


I never seem to have the packaged taco seasoning on hand when I want it so I decided to make my own. It is Super Simple and I had all the ingredients in the cupboard. The following is the recipe for one batch, however, I quadrupled it so I would have some on hand for a later time.
 
Homemade Taco Seasoning (One batch)
 
1 Tbsp chili powder
1/2 tsp garlic powder
1/2 tsp onion powder
1/4 tsp crushed red pepper flakes
1/2 tsp dried oregano
1/2 tsp paprika
1.5 tsp ground cumin
1/2 tsp sea salt (or regular salt works too)
1/2 tsp black pepper
 
Mix this all together. Brown one pound of ground beef. Add taco seasoning and 1/2 cup water. Simmer for 10 minutes or until water is evaporated. Serve.
 
See, Super Simple!!!  And I like that I either have it on hand or can easily throw it all together if it is a spur of the moment Mexican night.  Or want to make Taco Cupcakes!
 
 
Taco Cupcakes (Makes 12 in large muffin cups)
 
Preheat oven to 375
 
Burrito size tortillas
1 can of refried beans
1/2 can of diced green chilies (I would have used the entire can but thought
                      it may be too spicy for kids)
1 pound seasoned ground beef
Shredded cheese
Toppings: Diced tomatoes, lettuce, sour cream, salsa, avocado
 
1. Spray 2 large muffin pans with spray oil.
2. Cut burrito in quarters.
 
3.  Fold a quarter of the burrito into one half of the muffin cup. Press gently to fit into the cup. Repeat on the other side.


4.  Mix together the beans and green chilies. Put about 1 Tablespoon on top of the tortilla. (Approximately. It filled about 1/3 of the cup).
5. Layer with 1 Tablespoon (or so) of the seasoned beef. Fill to about 2/3 full.

6. Top with cheese.

7. Bake for 18 minutes. Check at 15 minutes to make sure the tortillas don't get too done.


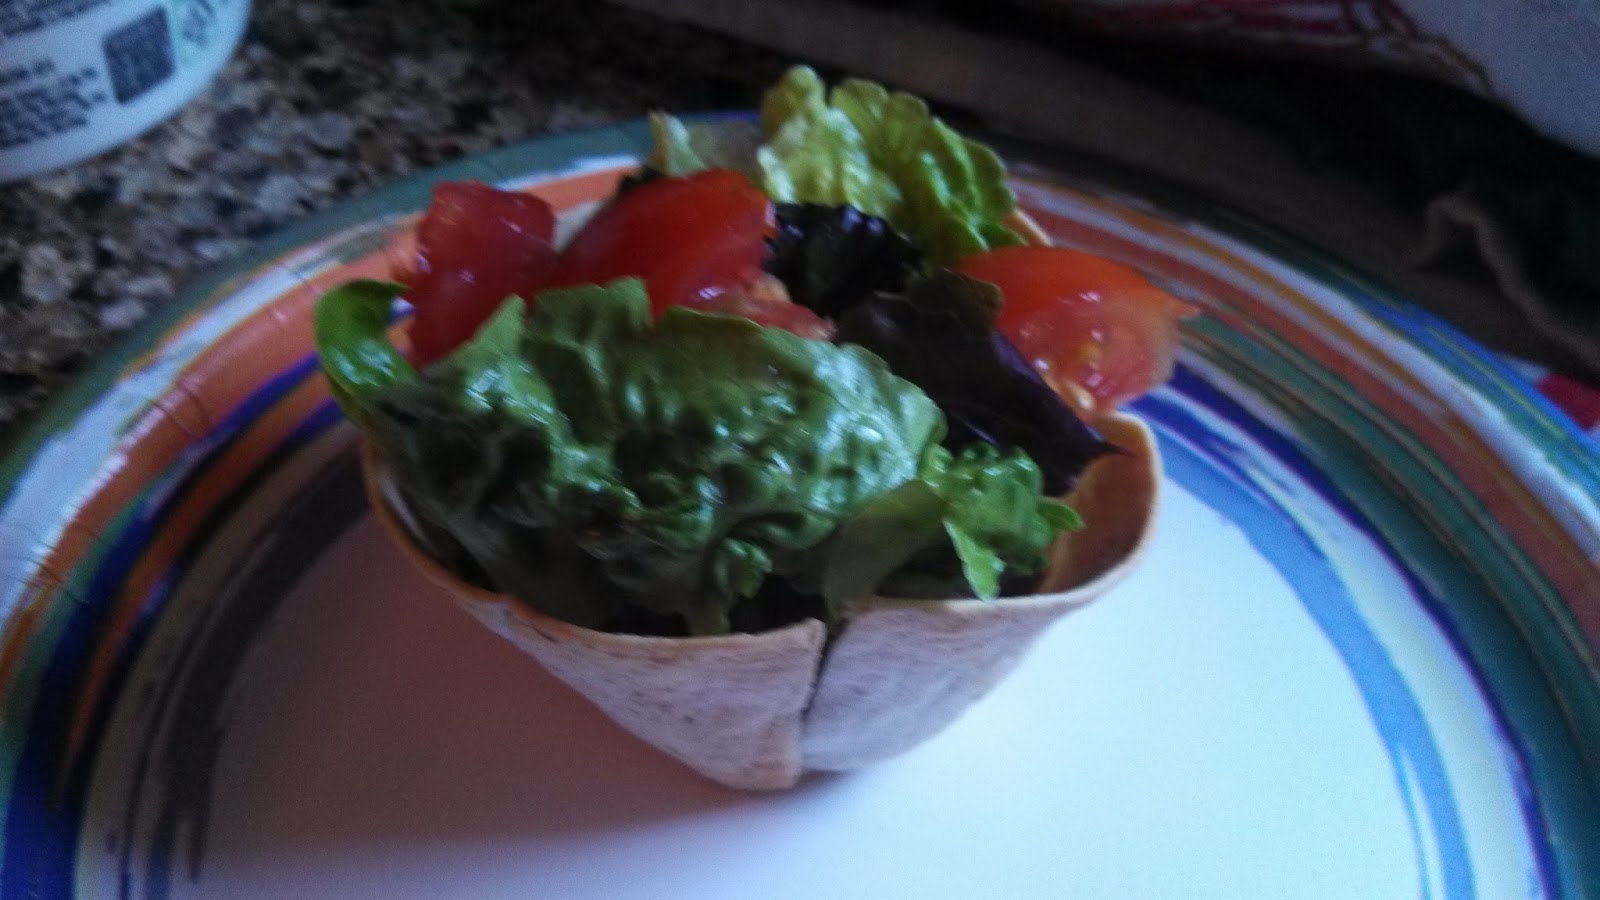
8.  Add toppings of your choice.

 
9. Serve and eat up, yum!
 
 
The kids loved these (as did I). I made two muffin tins thinking I would have enough left over for lunch today but they were such a big hit that there's only two left!  Next time I make them I will double the batch. I think these would freeze really well and would be nice to have on hand.


Thursday, July 18, 2013

Cucumber Salad


This year my cucumber plant is producing like crazy. Everyday there are at least 4 new cucumbers emerging. This translates to having at least two large cucumbers to eat for lunch or dinner.  One of my family favorites is cucumber salad. It is so super simple to make and tastes fantastic! Here's the recipe:

2 large cucumbers
1 medium onion
(Optional: add sliced tomatoes. I did because I had some that needed to be used).
1 cup white vinegar
1/2 cup sugar
1/2 teaspoon celery salt
salt and pepper to taste

Thinly slice the cucumbers and onion with a mandolin. (If you don't have one, you really need to get one! It makes quick work of slicing anything. Just remember to use the safety piece so you don't slice up your fingers).

Put these in a large bowl.

Mix the vinegar, sugar, celery salt, salt and pepper.  Pour this mixture over the cucumbers and onions. Toss to coat.

Refrigerate for several hours or overnight (the longer it soaks, the better).


That's it! Told you it was super simple!

Sunday, June 23, 2013

Crock Pot Corn on the Cob

As anyone who know me knows, I use the crockpot to cook every and anything. We had a family cookout yesterday evening and I had four of the grandkids who were eager to go swimming at the neighbor's pool so I got creative in my food prep. Crock pot corn on the cob!  A super simple, make it and forget it recipe. Here's how it is done:

8 ears of corn (shucked and cleaned)
1/2 a stick of butter
1 teaspoon garlic salt
1/2 teaspoon garlic powder
1/2 teaspoon Italian seasoning
(You can also add 1/2 teaspoon of chili powder, which I LOVE but thought the grandkids would be less than pleased so I omitted it).

Melt the butter, add in the seasonings. Lay each ear of corn on a piece of tinfoil that will cover the ear completely. Add a few teaspoons of butter mixture to each ear. Wrap and seal the foil tightly.

Lay all the corn into the crockpot. I got all mine in one crockpot because I cut some of them in half for the younger kids.  DO NOT ADD WATER!

Cook for 2.5 hours on high or 4 on low. I used my hottest crockpots (I did two batches). After 2.5 hours on high, I turned it on the "Keep Warm" setting for a couple hours before serving.

The corn was fantastic! Tender and yummy!  This may be my new favorite way to do corn. Try it, you will love it!

Thursday, July 19, 2012

Doggie Fro Yo Recipe


It has been crazy hot here in Central PA this week (104 yesterday) so I thought I'd give the pups a cool, frozen treat. I've seen the frozen dog treats at the grocery and they are pretty pricey. I did a quck search online and found the following frozen yogurt recipe.

Doggie Frozen Yogurt Recipe

36 ounces of plain, low fat yogurt
1 cup low sodium peanut butter
2-4 ounce jars of banana baby food
2 T honey

Mix the ingredients together then pour into 3 ounce dixie cups. Put a dog biscuit in the middle to use as a handle.  Freeze for a few hours.  When solid, cut off the cup and serve.

You can also cut this recipe in half. I made a big bunch since my granddogs were coming over. The dogs LOVED them!


This is Flea. The picture is misleading. While he started off eating this like a human, he quickly decided to chomp the entire thing.


You can see Flea in the background. I can't believe he didn't get a brain freeze. Georgie, however, chose to savor his treat.


Here's Flea in his pool. He LOVES the water! His nickname is Big - for good reason. His body fills the kiddie pool.


Stay cool!

Thursday, May 3, 2012

Flax Seed Pizza Crust

Recently I decided to add flax seed to my diet. Sometimes I have digestive issues and flax seed is really good for that.  Flax seed is a good source of Omega-3's and super high in fiber.  WebMD has a good overview of the benefits of flax seed, located here:  WebMD flax seed.

I found a recipe for flax seed pizza crust on Yummly.  I know, it probably doesn't sound good but trust me, it was tasty.

Ingredients

1 1/2 cups flax seed meal
2 tsps baking powder
1 tsp salt
1 tsp oregano
1/2 tsp spices (italian)
1 tsp granulated garlic
                         1/2 tsp onion (granulated)
                         1 tbsp splenda (sugar substitute)
                          3 tbsps oil
                          3 eggs
                          1/2 cup water

Note:  To make flax seed meal, just grind up whole flax seed in a mini grinder. My grinder is small so I had to do this is several small batches.  You can get flax seed at most grocery stores, WalMart, or I got this on sale at Big Lots and was the usually expensive Old Mill Brand.

The photo to the right is what the flax seed looks like after being ground.  It becomes like a meal.  Now you just follow the instructions below.

Preheat oven to 425.

Mix dry ingredients together.
Mix wet ingredients together, add to dry, and mix well.
Let sit for 5 minutes to thicken up.
Spread on pan (I put a greased parchment paper down on the pan first and spread mixture on that.
Bake for 15-18 minutes until cooked through, then add toppings and cook until they are done.


There was no need to get out the roller to put this into the pan. I just dropped the crust on the prepared pan and smoothed with my fingers.  Just make sure it is relatively even so it bakes even. At this stage, put the untopped crust in the oven for 15-18 minutes.

Then take out of oven and add your favorite toppings.  I topped mine in the following order:  spinach pesto (recipe below); home made bruchetta from last summers tomatoes to add some color; cut up artichokes; an array of cheeses: feta, sharp cheddar and regular cheddar. 


I served the pizza with grilled zucchini.  Here it is plated:


My verdict is that it was pretty tasty.  It does have a very different taste from pizza made from a flour dough (this is nuttier and of grainy texture).  I thought it was good but my daughter Breanna didn't like it. She didn't like the texture of the crust and wasn't so keen on the spinach pesto either.  Clearly, this isn't for everyone.


Given the super good nutrient qualities of flax seed I will keep trying other recipes that incorporate that ingredient. I've seen other recipes (like breads) so I will just keep experimenting.

Spinach Pesto Recipe

On Sunday I was hungry for pizza and wanted to try out a recipe for pizza crust made from flax meal (see the next post).  My favoite pizza is basil pesto, artichokes and feta cheese. sadly, I didn't have any jarred pesto so I had to improvise.  I've been on a spinach kick lately; someties for dinner I will saute spinach and roasted garlic and just have that for dinner.  Yummy and good for you at the same time. Can't beat that!

I went on a search for an alternative to basil pesto.  I found the following recipe for spinach pesto. It is made the same way you would make basil pesto.  Another easy recipe.

Ingredients:

  • 4 cups washed, torn spinach leaves, stems removed, well packed. This was 2 bags of spinach
  • 3 garlic cloves, halved
  • 3 tablespoons pine nuts
  • 1/2 teaspoon dried leaf basil, crumbled
  • 1/4 cup extra virgin olive oil
  • 1/3 cup grated Parmesan cheese
  • 1/8 tsp. salt

Preparation:

Place a few spinach leaves, garlic, pine nuts, basil and a little oil in blender or food processor container. Cover and puree until leaves begin to look crushed. Continue adding spinach leaves a few at a time with small amounts of oil to blender, using a rubber spatula to help to combine pureed mixture. Add Parmesan cheese and 1/8 tsp. salt. Cover and process until spinach pesto mixture is smooth.
I added a little more salt and basil to this recipe. I also found it tasted much better after it sat in the refrigerator for a bit.  Granted, it's not basil and doesn't have that taste but it's not bad and serves as a stand in.
The recipe was originally posted on About.com's Southern Food.

Saturday, March 31, 2012

Andes Mint Cookies Recipe

I found this recipe on Pinterest (where else?!) on the Six Sisters Stuff website. This is a great site; it is six sisters who created this blog to share recipes, crafts, and how to's with each other.  I recently gave them the Most Versatile Blogger Award.  Check them out; I think you will like them.

My son Zack has always loved Andes Mints so this recipe was perfect for a treat for him.  This morning, my granddaughter Kylie and I made them as a belated birthday gift for him (with help from brother A.J.).  The recipe is so easy: It only has 4 ingredients. Here's what you need:

1 box of Devil's Food or chocolate cake mix
1/2 cup oil
2 eggs
1 box of Andes Mints

1.  Heat oven to 350. 
2.  Mix together cake mix, oil and eggs.
3.  Drop by teaspoonfuls onto greased cookie sheet. 
4.  Bake 8 minutes (the original recipe said 6-10 but 8 worked best for us).

While the cookies are baking, unwrap all the candies. Make sure you do this or you will be scrambling to do the next step.

5.  As soon as you take the cookies out of the oven, place an Andes Mint in the center of the cookie. Let them sit for a few minutes so the chocolate will melt.
6. Once the candy has melted, spread chocolate over the top of the cookie.
7. Eat them up YUM!


Based on the size of our spoonfuls, this recipe made 36 cookies. We were fortunate that we had another box of Andes Mints because there are only 28 mints per box. We had a second box so we were able to make all the cookies. I suppose you could substitute another chocolate candy, like miniature Snickers or Milky Way.  I would cut those in half though because they would be too much candy for the size of the cookie.

 Here's my sweet granddaughter Kylie who made these cookies with me. They were really simple to make and we had alot of fun. And these cookies are so good!


Broccoli Slaw Salad Recipe

I really like broccoli salad but it always seems like alot of work for me. I know it's really not but it does take some time to clean and cut up the broccoli.  In my quest to work smarter and faster, I created this recipe for broccoli salad.  It is really yummy and quick to throw together.


1 bag of broccoli slaw
1/2 cup Sweet Vidala Onion Dressing
1/3 cup raisens/cranberries and nut mix
1/4 cup bacon bits
2 dashes of ground mustard
salt and pepper


I love this slaw mix. This is shredded broccoli, carronts and cabbage. There are other versions of this (just broccoli and/or broccoli and carrots mix). It doesn't matter what kind you get. It's a matter of preference. 

Put about half of the dressing in a large bowl and add the bag of broccoli slaw. I do this because you want to make sure the veggies on the bottom of the bowl will be covered.  Toss in the rest of the dressing and mix well.  I used tongs to flip it around to mix. Because the veggie mix is shredded, this worked better and was more manageable than using spoon.


Toss in the nuts and bacon.  I used this cranberry nut mix that I got on sale at Big Lots but you could use any mix.  And if you don't like nuts, you can just use cranberries or raisens.  I finished it off with just a few dashes of dried mustard.  I like the bite that dried mustard brings to this recipe. NOTE: If you don't have dried mustard, DO NOT use regular mustard. It just isn't the same! Add salt and pepper to taste.

I like to let the finished mix sit in the refrigerator for a few hours to let the flavors blend together.


You can add more or less of any of these ingredients to suit your taste. The salad throws together in a few minutes and I love it!  It's become my latest food obsession and I make a new batch of it every few days.  Try it, I think you will like it.


Saturday, February 11, 2012

Homemade Pretzel Bites

I'm on a mission to actually DO some of the stuff I've been pinning so today I made homemade pretzel bites. It was super easy and they came out so yummy.  The link with all the instructions can be located here:  Just Get Off Your Butt and Bake (Don't you love the name of that blog)?

This link has step by step directions so I won't redo the entire thing. What makes this so easy is that you use frozen bread dough (thawed).  I just put the dough out of the freezer in the a.m. and, within a few hours, it was thawed and good to go.  Here's how mine came out:


The recipe called for using cinnamon sugar OR parmessan cheese.  I didn't have any cinnamon so I used kosher salt for one kind and some herb mix I had in the cupboard for another flavor.


I have several of these flavor things that I just don't use all that often.  This was a very good use for it!  They came out yummy and I recommend this recipe.


Sunday, January 1, 2012

New Year's Day Meal With Pea Salad Recipe


For New Year's Day I always make the traditional pork and saurkraut. I usually just dump the saurkraut in the crockpot with a pork roast and cook for hours. This year, I did put the saurkraut in the crockpot but I had a rosemary seasoned pork loin that I browned in a pan first with a little oil. After it was nice and brown, added to the saurkraut. I deglazed the pan with a little white wine and water and added that to the crockpot.  It did give a very different taste....Yum!

I'm also making oven baked rosemary potatoes and crockpot spiced apples.  Super simple and tasty!

I wanted to make a veggie and didn't feel like going to the store yet again this week! I rooted around the freezer and decided to make Pea Salad. I don't remember the last time I had/made this and it really is tasty.  Here's the recipe:


Pea Salad
  • 2 lb. bag of frozen peas
  • 4 hard boiled eggs, chopped
  •  
  • ½ cup of chopped bacon (I used the chopped kind in the bag)
  • ½ cup of chopped onion (I used sweet yellow but you can use red or green onions if you have them)
  • ½ cup of mayo
  • 1/8 t of salt and pepper (I used garlic pepper)
  • ½ t of ground mustard
Either thaw the bag of peas on the counter for several hours or defrost in the microwave (5 minutes at 50%).  Run cold water over them and drain well in colander.  Add all remaining ingredients mixing well.  Refrigerate for several hours to let the flavors meld.

I think the key to this recipe is the ground mustard. I don’t like the taste of regular mustard but dried, ground mustard has a totally different taste. 

Hope you have a wonderful New Year!

Wednesday, November 23, 2011

Apple Bread Recipe

I had my friend Jenn over for dinner last night and wanted a little something sweet to go along with the chicken croquettes I made.  I found this recipe for apple bread (http://www.food.com/recipe/apple-bread-20549) but I didn't have all the ingredients. I made substitutions based on what I had on hand, as well as to cut down the amount of oil used.  Here's my recipe for apple bread.
  • 3 cups flour
  • teaspoon cinnamon
  • 1/2 t pumpkin pie spice
  • 1 teaspoon baking soda
  • 1 teaspoon salt
  • 1/4 teaspoon baking powder
  • 3/4 c egg substitute (or 3 eggs)
  • 2 cups splenda or sugar
  • 1/4 cup oil
  • 3/4 cup applesauce
  • 1 tablespoon vanilla
  • 2 cups diced apples (without skins)
  • 1/2 cup chopped walnuts OR dried cranberries (I made both)
  • 1 teaspoon flour
Directions:
Preheat oven to 350 degrees
Mix flour, cinnamon, soda, salt and baking powder together.
Beat egg substitute (or eggs) and add sugar and applesauce and oil.
Add vanilla and dry ingredients.
Stir in apples.
Mix walnuts OR cranberries in a tsp of flour and add to batter.
Pour into 2 greased loaf pans.
Bake at 350 degrees for 45 minutes (check then; the original recipe said to cook for an  hour but mine was done at 45 minutes).
YUM!

Sunday, September 25, 2011

Crockpot Macaroni and Cheese

I've made crockpot mac and cheese for so long that I don't have a written recipe. But as per Jenn's request, here it is!

  • 1 box of macaroni (elbow, rontoni, riggatoni: whatever you like)
  • 12ounces of grated sharp cheese (1.5 blocks). While I prefer sharp or extra sharp, I will use whatever I have on hand.
  • 4 ounces of cream cheese, cut into cubes
  • 1 t powdered mustard (if you have it. If not, you can make without. I just like the little bit of spiceness this gives).
  • 1 t salt
  • 1/2 t pepper
  • 4 T butter or margerine
  • 20 ounces of milk (or more)

Cook the noodles as instructed on the box - except cook for 2 minutes less. This helps so the cooked mac and cheese isn't major mushy.  Dump into greased crock pot. Turn on low.

Add all ingredients, except milk, and mix.  Once that is done, pour in enough milk to bring to the top of the noodles and cheese. Stir a little, cover, and let it cook.

Check this in two hours.  Stir and add more milk as needed. You will want to keep the milk pretty high early on. As it cooks, the noodles absorb the milk and it thickens up. Once it starts to thicken up, check back every hour or so to make sure it isn't getting mushy or dried out.

The time needed for this really depends on your crockpot. In some of my crockpots (I have 5!) it takes 4 hours; in others it takes more like 6. 

Yummy, yummy!  Enjoy this Jenn and let me know how it comes out for you.

Homemade Canned Salsa Recipe

Yesterday I stopped by my favorite farmer's market Oak Grove Farms. If you haven't been, it is located off Williams Grove Road in Mechanicsburg. They have amazing produce: All locally grown and incredibly fresh. Their prices aren't much higher than the regular grocery store and you can't beat the taste!

At this time of year they always have boxes of "seconds": Fruits and veggies that need to be used up in short order before they go bad. I always get tomatoes there for canning. Yesterday I got a big box of tomatoes and peppers for only $8.50!


I loved the mix of tomatoes and peppers.  So many flavors! (I still have 1/4 box of roma tomatoes and a gallon bag of peppers, even after making all this salsa)!

Here's the recipe:

  • Tomatoes- 20 cups peeled, cored, chopped tomatoes, which takes about about 8 lbs (yes, quite a few - you remove the skins, seeds and a lot of the water, so it takes a lot to start.)
  • 6 cups seeded, chopped chile peppers (about 2 lbs worth - less if you want a milder salsa)
  • 1/2 cup seeded, chopped jalapeno peppers
  • 5 cups chopped red onions (I used 4: didn't really measure them)
  • 1 head of garlic, finely chopped
  • 1.5 cups cider vinegar or lemon juice
  • 1 tablespoon oregano leaves
  • 1/2 cup fresh cilantro*
  • 1 1/2 teaspoons salt
  • 1 t chili powder
  • 1 18 oz can of tomato paste


  • Remove tomatoe skins by dropping cored tomatoes into boiling water. Let them in the water for 3-4 minutes then scoop out and drop into ice water. This process allows you to remove the skins quickly and easily.

    Once the tomatoes are skinned, squeeze out the seeds and liquidy insides.  Because I wanted to can this salsa, this step is important. If you don't remove the liquid, the end result of the salsa will be really watery. Chop up the tomatoes and dump into a big enamel pot, turned on medium heat.

    I then chopped up the peppers, onion, garlic, and cilantro in the food processer, which I added to the tomatoes. Add the spices as well. By this time, the mixture was starting to heat up and there was some liqued in the bottom of the pot. I scooped out about a cup or so and put in the food processor along with the tomatoe past. I whipped this up (just so it would be well blended) and put back into the tomato mixture.

    I add the tomato paste because it helps make the salsa thicker. When you heat the salsa during the canning process, it draws the water out of the tomatoes. Eventhough you think you got alot of water out of the tomatoes, they still have a high water content.

    I let this mixture cook on the stove for about 10 minutes. You don't need to cook this all that long as the canning process will do that for you.  (Once I got all the ingredients into the salsa pot, I filled up my canning pot and set the water to boil. While that was happening, I filled my clean, sanitized jars with the salsa mixture). This recipe made 12 pint jars of salsa.

    Put the filled jars into the boiling water and cook for 20 minutes. Remove the sealed jars and allow to cool on the counter. Viola! Enough salsa to last through the spring!


    If you want information on canning, Pick Your Own is one of my favorite sites. They have recipes and canning details, as well as links to local places where you can pick your own produce. 

    Crockpot Applesauce

    I was a total domestic goddess today!  Yesterday we went to Breanna's new house (looks amazing! They've done so much and it looks wonderful). Her house butts up against an apple orchard so we picked some apples. I came home with a nice big bag of apples.


    As you know, I make most anything in the crockpot. I use the slow cooker for multiple reasons. One is because I like to make things in stages. Using the crockpot enables me to do the prep and cooking first, and clean up later. Second, I love the wonderful sweet smells the come from cooking something for hours. This recipe filled my house with lovely aromas of apples and spices for most of the day; who needs a smelly candle when you can get these scents naturally?!

    Here's my recipe:

    • 10 apples (cored, peeled, and cut into pieces. Mine were about 1" but I wasn't precise)
    • 2 t pumpkin pie spice (you can use cinnamon if you want but I like the mix of flavors with pumpkin pie spice)
    • 1 t vanilla
    • 1/2 c brown sugar
    • 1/2 c water
    Dump the apples in the crock pot, add the other ingredients and mix well to coat. Set crock pot on low and cook for 6-8 hours. 


    That's it!  Super simple.  I like my applesauce chunky so I don't mash it up. If you like smoother applesauce, mix the cooked applesauce with an immersion blender or stick in the food processer.

    This recipe made a quart (which I canned) and about 2 additional cups (which I put in the fridge to eat this week). Try the recipe and let me know how much you love it!


    Yummy!


    Monday, September 12, 2011

    SkinnyTaste Hot Spinach and Artichoke Dip Recipe

    I know we all love hot spinach and artichoke dip. It tastes great but really packs alot of calories if you make it the traditional way with mayo. I found this recipe from Skinnytaste.com that uses Greek yogurt that is far healthier (and less calories) than the other version.  I really don't like the taste (or texture) of Greek yogurt but this sounds like a tasty substitute. I doubt you will taste the yogurt because all the other flavors will make up for it.  Next time I want the dip, I will try this recipe.

    Skinny Taste Hot Spinach and Artichoke Dip Recipe